Mautic Dokumentation (EN)

1. Getting Started (Source: Mautic Documentation)

Awesome! You’ve downloaded a marketing automation tool. That’s a great first step, but now you wonder where to go from here. Follow this very simple guide to get started using your shiny new toy!

Step 1.1: Install Mautic

If you have already downloaded the zip from the download page or have installed Mautic through some other source (Softaculous, Bitnami, Digital Ocean etc…) then you have already completed the first step. If not then you will need to upload the Mautic package (a zip file) to your server; unzip the files; and then navigate to that location in your browser. You will find Mautic has a very easy to follow on-screen installation process.

Step 1.2: Add Cron Jobs

Once you’ve installed Mautic you will need to create a few standard cron jobs to have your software process various tasks. These cron jobs can be created through a cPanel or added through command line. If you are unfamiliar or uncomfortable with this step then we’d recommend asking in the forums or in the live Slack chat. Here is a list of the cron jobs you’ll need to create. (Please note: “/path/to/mautic…” will reflect the directory where your version of Mautic is installed.)

Updating Segments

php /path/to/mautic/app/console mautic:segments:update

Update Campaigns

php /path/to/mautic/app/console mautic:campaigns:update

Execute Campaign Actions

php /path/to/mautic/app/console mautic:campaigns:trigger

Review Cron Jobs for more information on these and other optional cron jobs.

Step 1.3: Download the IP lookup service database

By default, Mautic installs set to use MaxMind’s free GeoLite2 IP lookup database. Due to the licensing of the database, it cannot be included with Mautic’s installation package and thus must be downloaded. Click on the cogwheel in the upper right hand of Mautic to view the Admin menu then click Configuration. On the System Settings tab, scroll down to find the IP lookup service option and click the “Fetch IP Lookup Data Store.”

You could also choose another supported IP lookup service if you prefer.

Step 1.4: Install the Tracking Javascript

After installation and setup of the cron jobs you’re ready to begin tracking contacts. You will need to add a simple javascript to the websites for each site you wish to track via Mautic. This is a very simple process and you can add this tracking script to your website template file, or install a Mautic integration for the more common CMS platforms. Here is an example of the tracking javascript:

<script> (function(w,d,t,u,n,a,m){w['MauticTrackingObject']=n; w[n]=w[n]||function(){(w[n].q=w[n].q||[]).push(arguments)},a=d.createElement(t), m=d.getElementsByTagName(t)[0];a.async=1;a.src=u;m.parentNode.insertBefore(a,m) })(window,document,'script','http(s)://yourmautic.com/mtc.js','mt'); mt('send', 'pageview'); </script>

You’ll need to change the site URL (replace yourmautic.com with your own URL) in the above script.

Checkout Contact Monitoring for more details.

2. What’s New

In this section we’ll highlight the new features for each major release of Mautic. They are in version order beginning with the latest.

Version 2.0

Mautic 2.0 brought a significant number of enhancements to Mautic. The full release notes are at https://github.com/mautic/mautic/releases/tag/2.0.0.

Hosting Requirements

  • The PHP minimum version is now 5.6.19 (PHP 7 is supported!)
  • The MySQL minimum version is now 5.5.3
  • PostgreSQL support has been dropped

Cron Jobs Update

See Cron Jobs

Froala editor

This release switches CKEditor in favor of Froala editor which has a more polished look and functionality.

New email and page builders!

Email and page builders have been overhauled to be cleaner and better. This means that custom themes have changed as well. Watch this video for more.

Dynamic web content

You can now push contact aware content to your web pages through Mautic campaigns. See Dynamic Web Content

Bi-directional Salesforce Integration

This much anticipated feature is now in Mautic! For an overview watch this video.

Lifecycle stages

You can now track your contacts through various stages and lifecycles. Watch this video for more.

Updated Dashboard

Drag and Drop with new widgets for end-to-end attribution and more. Watch this video for an overview.

UTM Tags

A simple code you can attach to a custom URL to track content and more. The UTM tags that are currently supported are:

  • utm_campaign
  • utm_content
  • utm_medium
  • utm_source
  • utm_term

For more information on this watch this video.

3. Dashboard

Mautic 1.4.0 brought a customizable dashboard where each user can compose widgets with information she/he wants to track. Mautic 2.0 brought a number of enhancements to the Dashboard.

Date range filter

All the widgets will display data in the selected global date range filter at the top of the widget list. The default date range is set from 30 days ago to today. Line charts will change the time unit automatically depending on the day count selected in the date range filter like this:

Date range is equal 1 day: Hours Date range is between 1 and 31 days: Days Date range is between 32 and 100 days: Weeks Date range is between 101 and 1000 days: Months Date range is greater than 1001 days: Years

The only widget exceptions which display the same information independent on the date range are Upcoming emails and Recent activity .

Widgets

Warning: Do not create too many widgets. It can slow the dashboard page load down. If you have performance issues, decrease the amount of widgets.

A new widget can be added to your dashboard when you click on the “Add widget” button. The “Add widget” form which appears after each widget will let you define:

  • Name : Describe what the widget displays. If not filled, Mautic will call it the same as the widget type you select.
  • Type : Select what information you want to display from the predefined widget types.
  • Width : Select how wide the widget should be. The options are 25%, 50%, 75%, 100%. Default option is 100%. The optimal width for line charts is 100%, for tables 50%, for pie charts 25%.
  • Height : Each widget can have different height. 5 heights are predefined. The dashboard will look best if you select a constant height for each widget in one row.

Some widgets have additional options:

Created contacts in time

  • Show all contacts: Displays one line with all created contacts.
  • Only identified: Displays one line with only created identified contacts.
  • Only anonymous: Displays one line with only created visitors.
  • All identified vs anonymous: displays 2 lines with created identified and visitors.
  • Top segments: Displays up to 6 lines with contacts added to the top 6 segments. If no such segment exists for the selected date range, the chart will not be displayed.
  • Top segments with Identified vs Anonymous: Displays up to 6 lines of the top 3 segments for the selected date range. Each segment will show 2 lines with identified and visitors.

Emails in time

  • Only sent emails: Displays 1 line with sent emails.
  • Only opened emails: Displays 1 line with opened emails.
  • Only failed emails: Displays 1 line with failed emails.
  • Sent and opened emails: Displays 2 lines with sent and opened emails.
  • Sent, opened and failed emails: Displays 3 lines with sent, opened and failed emails.

Page visits in time

  • Total visits - Displays 1 line with all visits (page hits).
  • Unique visits - Displays 1 line with unique visits (contacts).
  • Total and unique visits - Displays 2 lines with unique and all visits.

Widget ordering

Each widget can change its location by drag&dropping. The handle is its name.

Dashboard export

Each dashboard as you configure it can be exported to a single file. You can make a backup for another time, send it to a colleague or share it online. It exports only the widget configuration. Not the data in them.

Dashboard import

If you export a dashboard, you can then upload it and import it again in the Dashboard Import page.

Stock Mautic installation comes with 3 pre-defined dashboards. The one called default.json is imported automatically, when your dashboard doesn’t contain any widget. The other 2 predefined dashboards are there as an example. You can export and import any other dashboard and then switch between them. Pre-defined dashboards can be:

Previewed - It will display the dashboard widgets for preview. It will load in them actual Mautic data. Nothing is saved or changed by the Apply button. Applied - It applies the dashboard as your dashboard. Warning: Your current widgets will be deleted by this action! Export the current dashboard if you want to get back to it later. Deleted - It will delete the predefined dashboard.

Widget cache

The WidgetDetailEvent automatically caches the widget detail data for a period of time defined in the configuration. Default cache expiration period is 10 minutes.

Dashboard Permissions

If a Mautic user doesn’t have the see others or see own permissions for a bundle, she/he won’t be able to create widgets for said bundle. However, the widget can still be visible at hers/his dashboard. For example if a user creates the widgets and then the admin removes the permission or via import. In that case the widget is there, but with a message that the user doesn’t have permission to see the data.

If a Mautic user has permission to see only his/hers own data from a bundle, he/she will see only his/hers own data in the Dashboard widgets. For example only contacts which he/she owns, page hits of the pages he/she created and so on.

4. Contacts

Leads were renamed to contacts in Mautic 1.4.0.

Contacts are the central factor of a marketing automation platform. These are all the individuals who have visited your websites or interacted with you in some way.

Contact Types

There are two types of contacts:

  • Visitors (formerly anonymous leads) — visitors to your site who have not yet been identified by a form or other interaction.
    • These contacts are tracked by Mautic but typically remain hidden so as not to clutter your segment.
  • Standard contacts — contacts which have identified themselves via a form or some other source. As a result, these contacts typically have a name, email, and other identifying fields.

Visitors (formerly anonymous leads)

Anonymous leads were renamed to visitors in Mautic 1.4.0.

You can view visitors by using the ‘table view’ (use the “t” keyboard shortcut to view contacts in a table or “c” as cards) within the contacts section.

Visitors are worth tracking, because these could be future customers. By tracking them before they have any interaction, you can retain a log of when they visited your site, which allows you to get a picture of their activity prior to engaging with you.

Search Text
is:anonymous
Screenshot

The resulting list will be those IP addresses which have not yet provided identifying information.

Standard Contacts

The second type of contact is a standard contact. These contacts have identified themselves via a form or other source — you may also have more information about them from previous interactions. As a result, these contacts typically have a name, email, and other identifying information which can be associated with the contact.

The standard contact is the preferred contact within Mautic. These are contacts which may have started as a visitor, but at some point provided additional information such as a name, email address, social network handle, or other identifying characteristics. You can nurture these contacts through the Mautic marketing automation platform.

The Manage Contacts section provides more information on what you can manage with standard contacts.

4.1 Manage Contacts

The manage contacts page is the main interface through which you can view and interact with your contacts - both visitors and standard contacts.

Segments

The segment is the default tabular view of all the contacts in the system - by default the list view is enabled, but you can also choose to switch to the card view (also known as grid view ) which uses avatars to depict the contacts visually using cards. You need to be using keyboard shortcuts you can enter “t” on your keyboard to dynamically switch to table view (default) and “c” to switch to the card view.

Searching for contacts

The segment can be searched using the box at the top of the list, and can be ordered using the table headings by clicking on the heading you wish to sort the list by.

The search box allows many different search types and follows the same search process and variables as found in all other search layouts. You can learn more about the powerful search options available on the search documentation page.

Adding contacts quickly

If you have contacts you would like to quickly add to Mautic manually, and they are not in the system as part of the normal workflow (for example by completing an inquiry form or having been imported) you can use the Quick Add Contact button to add them to the system.

You can of course also add them through the New Contact form and add much more detail but for quick entry this is the easiest and fastest way to get the contact into the system.

Adding contacts normally

If you have contacts to import and you have time to add all the information, click on the dropdown arrow to the right of ‘Quick Add Contact’ and select ‘New’. This opens the new contact screen, where you can enter all the information you have about the contact. Use the tabs at the top to add custom fields and social network profiles.

Importing contacts

Mautic offers the ability to import contacts from other sources via CSV file - this is a great way to get up and running quickly if you need to import a lot of contacts at once.

To use the import facility, make sure that you first have all the fields set up under ‘Manage fields’ which correspond to the information you are importing - you don’t want to lose any data if at all possible.

Once you have created all the contact fields, click on the dropdown arrow to the right of the Quick Add Contact button, and select ‘Import’.

Upload your CSV file, and ensure that you match the delimiter, enclosure and escape characters so that the importer can understand the data.

When you click on ‘Upload’ you will have the opportunity to match the fields found in the CSV file to the fields that you have in Mautic, which will allow the data to be correctly imported.

Following values will result in TRUE when importing a Boolean value: 1 , true , on and yes . Those values can be also capitalized and still taken as TRUE. Any other value will be saved as FALSE.

Editing contacts

To edit a contact, click on the name of the contact (or the IP address if the visitor is anonymous) to open the contact screen.

From this screen, you can view the recent events and any notes that have been made against the contact.

To edit the contact, click on the ‘edit’ button on the top-right menu.

Contact duplicates

When Mautic tracks contact’s actions like page hits or form submissions, it will automatically merge the contacts by unique identifiers which are:

  • IP address
  • Email (or any other contact field you mark as unique identifier)
  • Cookie

If Mautic knows only the IP address, it will merge the contact action (page hit, form submission etc.) with a contact with the same IP address. If the IP address does not exist in the Mautic database yet, it will create a new contact. But if Mautic knows the unique cookie, it will merge the actions to the contact with the same cookie or creates a new one.

If a contact sends a form with an email address, it will merge the submission with the contact having the same email address. Even if the IP address or the cookie matches another contact.

So Mautic will take care of duplicate contacts created by the event tracking. But you can still create a duplicate contact via the Mautic administration. As of Mautic 2.1.0, you will be notified if there is already a contact with the same unique identifier.

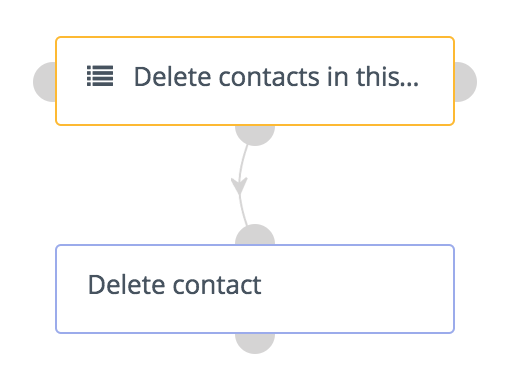
Delete a bunch of contacts

The batch delete action in the contact table allows deletion of up to 100 contacts at one time. This is a performance precaution since deleting more contacts at one time could cause issues. This feature can be used for hundreds of contacts.

See in the segment docs about how to delete thousands of contacts easily.

4.1.1 Contact Overview

Each contact has a detail page where you can see what Mautic knows about him/her.

Engagements/Points chart

The Engagements line chart display how active the contact was in the past 6 months. Engagement is any action the contact made. E.g. page hit, form submission, email open and so on. The chart displays also the points which the contact received.

Avatar

Mautic will try to download the contact’s avatar image based on his/her email address from the Gravatar service. But it can be loaded also from some social networks.

History

The main tab displays the contact’s action history sorted from the latest to the oldest. Each action will display as many details as there is about it. For example a form submission will display what values the contact submitted, the email send action will inform you whether the email was opened and when and so on. You can filter what actions you want to include or exclude from the timeline if you are searching for a specific one.

Notes

Mautic can be used as a basic CRM. You or your teammates can write notes for a specific contact. A note can be marked with a specific purpose: General, Email, Call, Meeting. It’s also possible to define a date of a meeting or a call. If you do so, the note will also appear in the Mautic calendar.

Social

If the social plugins like Facebook or Twitter are enabled and authorized and the contact provided you a username for a social network, Mautic can display his/her feed for the social network in the Social tab. Most of the social networks limited their API since the feature was developed so search by email is not working.

Map

If Mautic knows the coordinates of the contact from a geolocation IP lookup service, it will display a fourth tab with a map so you can easily see where in the world the contact is located. If Mautic knows more locations for this contact as he/she travels, you’ll see all the locations there. If Mautic doesn’t know any location, the tab won’t show up.

Change contact segments

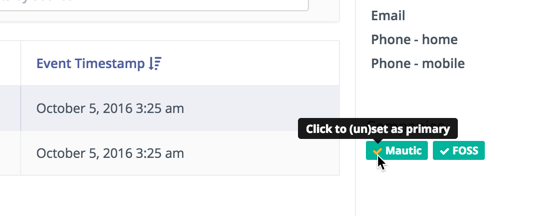
Click the drop down box arrow in the top right hand corner of the contact detail. Select Segments . A modal box will show up where you’ll see all the segments. The green switch means that the contact belongs to the segment, the orange switch means the opposite. Click the switch to add/remove the contact to/from the segment.

Change contact campaigns

Click the drop down box arrow in the top right hand corner of the contact detail. Select Campaigns . A modal box will show up where you’ll see all the campaigns. The green switch means that the contact belongs to the campaign, the orange switch means the opposite. Click the switch to add/remove the contact to/from the campaign.

Merge two contacts

If you have 2 contacts in the Mautic database who are physically one person, you can merge them with the Merge feature. Click the drop down box arrow in the top right hand corner of the contact detail, select the Merge item, a modal box will show up. Search for the contact you want to merge into the current contact. The select box will update as you search. Select the right contact and hit the Merge button.

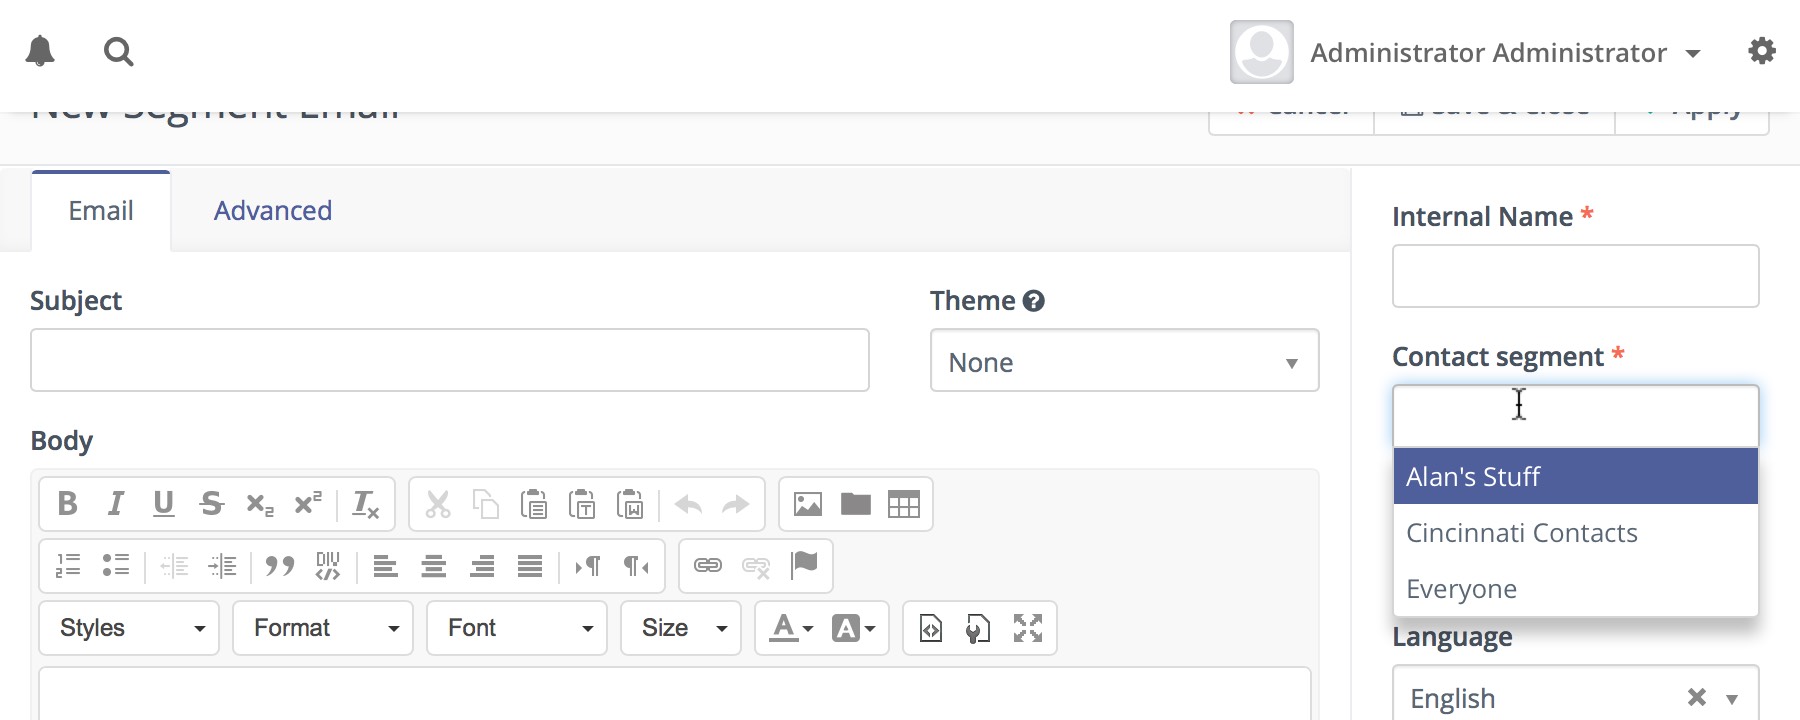
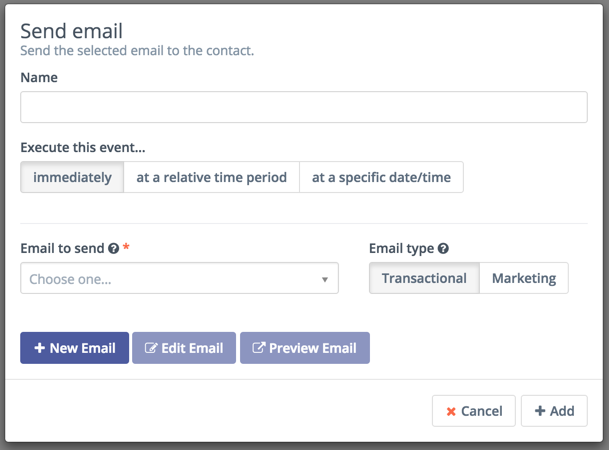
Send email to contact

The drop down menu in the top right corner of the contact detail page also lets you send an email directly to the contact. You can fill in From Name , From (email address), Subject and the Body message. You can also Import from an existing template . If you select some email from this select box, the Subject and the Body textarea will be prefilled from that pre-defined email template. Emails sent by this method are not tracked by Mautic.

4.1.2 Contact Monitoring

The act of monitoring the traffic and activity of contacts can sometimes be somewhat technical and frustrating to understand. Mautic makes this monitoring simple and easy to configure.

Website Monitoring

Monitoring all traffic on a website can be done by loading a javascript file (since Mautic 1.4) or adding a tracking pixel to the website. It is important to note that traffic will not be monitored from logged-in Mautic users. To check that the JS/pixel is working, use an incognito or private browsing window or simply log-out of Mautic prior to testing.

Javascript (JS) tracking

JS tracking method was implemented in Mautic 1.4 and recommended as the primary way of website tracking. To implement it, go to Mautic configuration > Landing Page Settings to find the JS tracking code build for your Mautic instance and insert its code before the ending <body/> tag of the website you want to track. Or copy the code below and change the URL to your Mautic instance.

As of 2.3.0, Mautic sets cookies with a lifetime of 2 years. Returning visitors are identified exclusively by the cookie. If no cookie exists yet, Mautic creates a new contact and sets the cookie. Make sure your website url is entered in the CORS settings. This is the first step in better contact identification. Note that if a browser is set to not accept cookies, this may result in each hit creating a new visitor. If this behavior is concerning, see Fingerprint option below.

<script>
    (function(w,d,t,u,n,a,m){w['MauticTrackingObject']=n;
        w[n]=w[n]||function(){(w[n].q=w[n].q||[]).push(arguments)},a=d.createElement(t),
        m=d.getElementsByTagName(t)[0];a.async=1;a.src=u;m.parentNode.insertBefore(a,m)
    })(window,document,'script','http(s)://yourmautic.com/mtc.js','mt');

    mt('send', 'pageview');
</script>

Don’t forget to change the scheme (http(s)) either to http or https depending what scheme you use for your Mautic. Also, change [yourmautic.com] to the domain where your Mautic runs.

The advantage of JS tracking is that the tracking request which can take quite long time to load is loaded asynchronously so it doesn’t slow down the tracked website. JS also allows to track more information automatically:

  • Page Title is the text written between </title> tags.
  • Page Language is the language defined in the browser.
  • Page Referrer is the URL which the contact came from to the current website.
  • Page URL the URL of the current website.

mt() Events

As of 2.2.0, mt() supports two callbacks, onload and onerror accepted as the fourth argument. The onload method will be executed once the tracking pixel has been loaded. If the pixel fails for whatever reason, onerror will be executed.

mt('send', 'pageview', {}, {
    onload: function() {
        redirect();
    },
    onerror: function() {
        redirect();
    }
});

Local Contact Cookie

As of Mautic 2.2.0, if CORS is configured to allow access from the domain the mtc.js is embedded, a cookie will be placed on the same domain with the name of mtc_id . This cookie will have the value of the ID for the currently tracked contact. This provides access to server side software to the contact ID and thus providing the ability to integrate with Mautic’s REST API as well.

Valid Domains for CORS are expected to include the full domain name as well as the protocol. (e.g. http://example.org). If you serve up secure and non-secure pages you should include both https://example.org as well http://example.org. All subdomains will need to be listed as well (e.g. http://example.org and http://www.example.org ), if your server allows this. If you would like to allow all subdomains, an asterisk can be used as a wildcard (e.g. http://*.example.org).

Tracking of custom parameters

You can attach custom parameters or overwrite the automatically generated parameters to the pageview action as you could to the tracking pixel query. To do that, update the last row of the JS code above like this:

    mt('send', 'pageview', {email: '[email protected]', firstname: 'John'});

This code will send all the automatic data to Mautic and adds also email and firstname. The values of those fields must be generated by your system.

Load Event

As the JS tracking request is loaded asynchronously, you can ask JS to call a function when a request is loaded. To do that, define a onload function in options like this:

    mt('send', 'pageview', {email: '[email protected]', firstname: 'John'}, {onload: function() { alert("Tracking request is loaded"); }});

Fingerprint (beta feature)

Mautic 1.4.0 comes with a tracking feature called fingerprint. Fingerprint2 library was used. It should work together or replace current tracking identifiers like IP address and/or cookie ID. This method is not yet deeply implemented into the system, but you can already see more information in the timeline page hit events in the contact detail:

  • Fingerprint - Unique hash calculated from browser settings and another environment variables.
  • Resolution - Width x Height of the device display resolution.
  • Timezone Offset - Amount of minutes plus or minus from UTC.
  • Platform - Platform of the device. Usually OS and processor architecture.
  • Adblock - A Boolean value whether contact uses an adblock browser plugin.
  • Do Not Track - A Boolean value if DNT is turned on.

If you’d like to store any of the values above to a contact detail field, create a new custom field called exactly like the name in the list above and make the field publicly updatable. You can also try to make the Fingerprint field unique and this way you can simulate the future fingerprint tracking. It is not a tested feature though, do not use it on production unless you tested it first.

Tracking Pixel tracking

This method is secondary since Mautic 1.4.

http://yourdomain.com/mtracking.gif

Tracking Pixel Query

To get the most out of the tracking pixel, it is recommended that you pass information of the web request through the image URL.

Page Information

Mautic currently supports page_url , referrer , language , and page_title (note that the use of url and title are deprecated due to conflicts with contact fields).

UTM Codes

Support for UTM codes in the contact time-line was introduced in version 1.2.1. Currently, utm_medium , utm_source , utm_campaign , utm_content , and utm_term are used to generate the content in a new time-line entry.

utm_campaign will be used as the time-line entry’s title.

utm_medium values are mapped to the following Font Awesome classes:

Values Class
social, socialmedia fa-share-alt if utm_source is not available otherwise utm_source will be used as the class. For example, if utm_source is Twitter, fa-twitter will be used.
email, newsletter fa-envelope-o
banner, ad fa-bullseye
cpc fa-money
location fa-map-marker
device fa-tablet if utm_source is not available otherwise utm_source will be used as the class. For example, if utm_source is Mobile, fa-mobile will be used.

All the Utm tags are available in the time entry, just by toggling the entry details button.

Please note that UTM tags are recorded only on a form submission that contains the action “Record UTM Tags”.

Embedding the Pixel

If you are using a CMS, the easiest way is to let one of our plugins do this for you (see below). Note that the plugins may not support all contact fields, utm codes or contact tags.

Here are a couple code snippets that may help as well:

HTML

<img src="http://yourdomain.com/mtracking.gif?page_url=http%3a%2f%2fyourdomain.com%2fyour-product-page&page_title=Some%20Cool%20Product&email=user%40theirdomain.com&tags=ProductA,-ProductB" style="display: none;"  alt="mautic is open source marketing automation" />

PHP

$d = urlencode(base64_encode(serialize(array(
    'page_url'   => 'http://' . $_SERVER[HTTP_HOST] . $_SERVER['REQUEST_URI'],
    'page_title' => $pageTitle,    // Use your website's means of retrieving the title or manually insert it
    'email' => $loggedInUsersEmail // Use your website's means of user management to retrieve the email
))));

echo '<img src="http://your-mautic.com/mtracking.gif?d=' . $d . '" style="display: none;" />';

Javascript

<script>
var mauticUrl = 'http://your-mautic.com';
var src = mauticUrl + '/mtracking.gif?page_url=' + encodeURIComponent(window.location.href) + '&page_title=' + encodeURIComponent(document.title);
var img = document.createElement('img');
img.style.width  = '1px';
img.style.height  = '1px';
img.style.display = 'none';
img.src = src;
var body = document.getElementsByTagName('body')[0];
body.appendChild(img);
</script>

Contact Fields

You can also pass information specific to your contact by setting Mautic contact field(s) to be publicly updatable. Note that values appended to the tracking pixel should be url encoded (%20 for spaces, %40 for @, etc).

Tags

The contact’s tags can be changed by using the tags query parameter. Multiple tags can be separated by comma. To remove a tag, prefix it with a dash (minus sign).

For example, mtracking.gif?tags=ProductA,-ProductB would add the ProductA tag to the contact and remove ProductB.

Available Plugins

Mautic makes this even easier by providing key integrations to many existing content management systems. You can download and use any of the following plugins to automatically add that tracking pixel to your website.

These are just a few of the integrations already created by the Mautic community. More will be added in the future and developers are encouraged to submit their own integrations.

Note: It is important to note that you are not limited by these plugins and you can place the tracking pixel directly on any HTML page for website tracking.

Identify vistior by tracking url

Mautic 2.9 add to Configuration option for identify visitor by tracking url. If enabled it, returning visitor will be identify by tracking url from channels (especially from emails) when no cookie exists yet.

Note: Email contact field have to be marked as unique indentifier and publicly updatable in Configuration.

Mobile Monitoring

The essence of monitoring what happens in an App is similar to monitoring what happens on a website. Mautic contains the building blocks needed for native (or pseudo-native) and HTML5-wrapper based Apps, regardless of platform.

In short, use named screen views (e.g. main_screen) in your App as your page_url field in the tracker, and the contact’s email as the unique identifier, see next section for detailed instructions.

Steps in Mautic

  1. Make the email field publicly editable, this means that a call to the tracking GIF with the variable email will get properly recognized by Mautic.
  2. Setup a form, which will be the access point of your campaign (e.g. a new contact email). Make this form as simple as you can, as you will be POST-ing to it from your App. The typical form URL you will POST to is
http://your_mautic/form/submit?formId=<form_id>

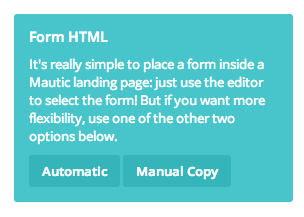
You can get the ID from the mautic URL as you view / edit the form in the Mautic interface (or in the forms tables, last column), and you can get the form fields by looking at the HTML of the ‘Manual Copy’ of the HTML in the forms editing page.

  1. Define in your campaigns the screens you want to use as triggers (e.g. ‘cart_screen’ etc.). Mautic is not looking for a real URL in the form ‘http://’ for page_url, any typical string would do. Like this:
http://yourdomain.com/mtracking.gif?page_url=cart_screen&[email protected]

In your App

A best-in-class approach is to have a class (say ‘mautic’) that handles all your tracking needs. For example, this sample method call would POST to the form with ID 3 - see previous section (note: for conciseness and ubiquity, these sample lines are written in JavaScript / ECMAScript-type language, use similar call in your mobile App language of choice).

mautic.addContact("[email protected]",3)

And then, to track individual user activity in the App, this sample call would make an HTTP request to the tracker:

mautic.track("cart_screen", "[email protected]")

Which is nothing more than an HTTP request to this GET-formatted URL (as also shown in previous section):

http://yourdomain.com/mtracking.gif?page_url=cart_screen&[email protected]

Important: Make sure in your App, that the above HTTP request is using a cookie (if possible, re-use the cookie from the mautic.addcontact POST request prior) AND that you reuse this cookie from one request to the next. This is how Mautic (and other tracking software) knows that it’s really the same user. If you can’t do this, you may run into the (unlikely but possible) case where you have multiple contacts from the same IP address and Mautic will merge them all into a single contact as it can’t tell who is who without a cookie.

Google Analytics and Facebook Pixel tracking support

Mautic supports contact tracking in Google Analytics and Facebook pixel. Go to Mautic Configurations Tracking Settings tab and setup:

Tracking codes support also Google Analytics USERID and Facebook Pixel Advanced Matching .

Campaign action Send tracking event

Action allow send custom event to Google Analytics or Facebook Pixel and depend on Visits a page decision.

How to test Google Analytics tracking code and campaign action
  • Install Tag assistent and enable recording on your website
  • Create campaign with Visits a page decision and Send tracking event action
  • Test it and see Tag assistent debug window with one Pageview request and 1 events

How to test Facebook Pixel tracking code and campaign action
  • Install Facebook Pixel Helper
  • Create campaign with Visits a page decision and Send tracking event action
  • Test it and see Facebook Pixel Helper debug window with one Pageview and one custom event action

Events should use for Remarketing with Analytics and Remarketing for Facebook Ads

Other Online Monitoring

There are several other ways to monitor contact activity and attach points to those activities. Website monitoring is only one way to track contacts. Other contact monitoring activities can consist of forum posts, chat room messages, mailing list discussion posts, GitHub/Bitbucket messages, code submissions, social media posts, and a myriad of other options.

Troubleshooting

If the tracking doesn’t work, take a look at Page troubleshooting or Email troubleshooting

4.2 Contact Import

Contacts can be imported via the user interface from a CSV file. You can either import in the browser or you can let a background job do it.

Since Mautic 2.9, when the import creates or updates a contact, you’ll see that action in the contact events history.

Browser import

The bigger CSV files have to be imported in batches to avoid hitting sever’s memory and time limits. In case of importing in the browser, your browser is controlling the batches. When one finish, the javascript starts a new one. This means the browser have to be opened and connected to the internet the whole time.

Use browser import only if you don’t have any other choice. Background import is recommended.

Background import

The background jobs (CLI command triggered manually or via a cron job) have advantage of benevolent time limits. So the background job is not restarted every batch (1 batch = 100 rows by default), but it just saves the data every batch. Background import will always be faster and more reliable than the browser import.

This option is available since Mautic 2.9.

Warning background import requires to run php /path/to/mautic/app/console mautic:import command periodically. Add it to your cron tab.

Successful result of the background job can look like this:

$ app/console mautic:import
 48/48 [============================] 100%
48 lines were processed, 0 items created, 48 items updated, 0 items ignored in 4.78 s

If there is no import waiting in the queue, there won’t be message.

Parallel import

The import can take several minutes. It’s possible that one import will still run when the other will be started. To prevent running out of server resources, there is the parallel_import_limit configurable option. By default only 1 import will run at the same time. This option can be changed when you add it to your app/config/local.php file.

How to stop a background import

Go to the list of imports and click on the green switch. This switch is used through the Mautic UI to unpublish items. It’s similar for imports. The import will change its status to Stopped . It will finish importing the current batch and than it stops the import.

When you decide to start the import again, you can simply publish it again and the background job will continue with the import.

When the background job finishes, either successfully or if it fails, you’ll get a notification in the Mautic’s notification area about it.

How to configure an import

  1. Go to Contacts .
  2. In the top right corner above the table of contacts open the sub menu of actions and select the Import option.
  3. Upload the CSV file with contacts you want to import.
  4. Adjust the CSV settings if your CSV file use something else as a delimiter, enclosure and so on.
  5. Upload your CSV file.
  6. The field mapping page should show up. The first set of options will let you select owner, segment and tags to assign globally to all imported contacts. The second set of options will let you map the columns from your CSV to Mautic contact custom fields. The third set of options will let you map columns from your CSV to special contact attributes like Date Created and so on.
  7. When your field mapping is ready, click one of the the Import buttons (described above).

Import statuses

There are several statuses of the import:

  • Queued - The import was created and queued for background processing. At this stage the import is waiting for the background job to start the import.
  • In Progress - The background job started the import and it hasn’t finished yet. You can see the progress in the list of the imports.
  • Imported - The import was successfully processed.
  • Failed - The import failed for some reason. Most usual cause may be that the uploaded CSV file was removed or Mautic doesn’t have permission to read it. Or the import was unresponsive for more than 2 hours.
  • Stopped - The import has been stopped by the user when it was in the Queued or In Progress states.
  • Manual - The user selected to import in the browser “manually”. It’s similar to In Progress .
  • Delayed - The background job wanted to start the import, but the import process could not start. So it’s delayed for later. The reason when this could happen is when the parallel import limit was hit. The import will start ASAP.

List of imports

The list of imports can be found when you go to the Contacts area, open the action menu above the contacts table and choose the Background imports option.

The table will show you basic statistics about all imports, what are the current statues and what was the CSV file name. There is also the switch which will enable you to stop and start Queued or In Process imports.

Import detail

The import detail page holds more detailed statistics and import configuration when you click on Details like import speed and how the import has been configured.

There are also 2 charts:

  1. The pie chart shows the ratio between created, updated and failed rows.
  2. The line chart shows how many contacts has been added per minute.

The main content area displays information about rows which were ignored for some reason (if any). The table will tell you what row in the CSV file it was and what was the reason, so you can fix those rows and import again.

In the right column you can see who created the import and when and also when the background job (System) updated the statistics after every batch was completed.

Automatic import option decision

There is an option in the Global Mautic Configuration / Contact Settings to define what is the optimal limit of browser import vs background import. If you insert for example 1000, that means that if the import CSV will have less than 1000 rows, it will be imported in the browser, if it will have more rows, it will be queued to be imported by the background job. Default value is 0 (zero), which means it will show you 2 Import buttons instead of one and you’ll have to decide what import option to use during every import.

Requirements

  • The CSV file must be in UTF8 encoding. Other encoding may cause troubles while importing. Read documentation of your spreadsheet program on how to export a spreadsheet to UTF8. Google Sheets encodes to UTF8 automatically, Libre/Open Office lets you choose before export.
  • In case of boolean values like doNotEmail or custom boolean field, use values true , 1 , on or yes as TRUE value. Anything else will be considered false.
  • In case of date/time values, use YYYY-mm-dd HH:ii:ss format i.e. 2017:01:02 19:08:00 . Other formats may work too, but it may cause troubles.

Tips

  • Name the column names the same as Mautic contact custom field names. This way Mautic automatically pre-selects the mapping for you. For example if you name the first name column as firstname , this field will be mapped automatically.
  • If your CSV contains thousands of contacts or more, divide such CSV into several smaller CSV files to avoid memory issues and slow import speed.

FAQ

Q: My import times out. What can I do about that? A: Either use the background job to import or change the batch limit to smaller number than 100.

Q: If I import Do Not Contact values, is that stored as a bounce or a unsubscription? A: It’s stored as a manual unsubscription. It’s the same thing as if the contact was marked as Do Not Contact from the administration.

4.3 Manage Segments

Lead lists were renamed to segments in Mautic 1.4.0.

Segments provide ways to easily organize your contacts. These segments can be configured from a variety of fields.

When viewing all segments you will notice the column on the right which shows the number of contacts matching that particular segment.

Segment Filters

In addition, these filters can be combined to either be inclusive or exclusive depending on your needs.

Once you have selected the field you can then choose the type of operation to perform. These vary depending on the way you wish to filter your contacts.

If you want to divide your segment based on certain criterion, and you wish to avoid sending duplicate emails to the (sub)segments, you can view and alter them through typing the alias name of the contact segments separated by ‘+’ only. You can add n contact segments to have their common, but you will always recieve the result as the intersection of the subsets. You can then manipulate the contacts to remove them from either one subset or all, hence avoiding duplicate emails to the same leads in the subsets.

Segments

Once you have created your segment, any applicable contact will be automatically added through the execution of a cron job. This is the essence of segments.

To keep the segments current, create a cron job that executes the following command at the desired interval:

php /path/to/mautic/app/console mautic:segments:update --env=prod

Through the execution of that command, contacts that match the filters will be added and contacts that no longer match will be removed. Any contacts that were manually added will remain part of the list regardless of filters.

Manual Addition

In addition to segments you can also manually add any contact to a list by clicking the Preferences button at the segments tab, use the dropdown to select a segment and add the contact to it or click on the x next to a segment in the input field to remove the contact.

Delete all contacts in a segment

Filter the contacts in the segment. The batch delete action in the contact table allows deletion of up to 100 contacts at one time. This is a performance precaution since deleting more contacts at one time could cause issues. This feature can be used for hundreds of contacts.

But deleting thousands of contacts this way in one segment will become a tedious task. Luckily, there is a trick how to let the background workers do the job for you.

  1. Create a simple campaign which has the segment as the source \
  2. Use the Delete contact action.

This way the mautic:campaign:update and mautic:campaign:trigger commands will delete all the contacts in the segment. As well as all the contacts which will be added to the segment in the future. Everything is done automatically in the background. The cron jobs must be configured. However, be aware that when a contact is deleted, there is no way to get it back.

4.4 Custom Fields

You can manage custom fields through the admin menu (click the cogwheel upper right hand side of Mautic).

The fields page will let you view all existing contact fields as well as any custom contact fields you’ve created.

You will notice the group column which will show you where the specific field will be shown on the contact profile. In the last column, you may see several icons which signify various properties of the field:

  1. Lock icon - These fields are unable to be removed as they are used by the core installation.
  2. List icon - These fields can be used as filters of segments.
  3. Asterisks icon - These fields are required when filling in the contact form
  4. Globe icon - These fields are publicly updatable through the tracking pixel URL query (see Contact Monitoring for more details).

Published Fields

The check mark which shows before each label title is a clickable toggle which will publish and unpublish the field.

New Field

You can create additional custom fields and define the data type you want that field to hold. In addition to the data type you will also select the group for that particular field. This will define where the field displays on the contact edit and detail view.

4.5 Contact Frequency Rules

Frequency rules are a set of rules used to define the number of times a contact should be contacted by any means in Mautic. At this stage Email and SMS have been implemented, but other forms of contact should also be applied as necessary. Such as social media mentions or messages sent in the future.

How to set frequency rules

  • Frequency rules can be set globally from the configuration panel on both the email and sms settings.
  • Frequency rules can also be applied on a contact’s detail page, from the dropdown menu on the upper right hand side. In this area you can select the channels where you want the rules to apply. Setting the rule here will override the general settings.

4.6. Manage Contact Preferences

When managing a contact you can set the contacts preference of communication. You can access the contact’s preference center when viewing a contact’s profile. From the dropdown menu click on the preference menu. A new modal window should appear with a tab to set the preferred channels and frequency of contact, as well as the option to pause communication within a given period of time. The second tab will give the option to add or remove the contact from global categories used in emails or categories. The third tab will allow to add or remove the contact from segments it belongs to.

Preferred Channels and Frequency

In this window you can enable/disable channels of communication, set the frequency of the communication via each channel enabled, and set one of the channels as a preferred channel.

To set a channel as a do not contact me through this channel, untick the tickbox next to the channel name in the first column.

When a channel is selected, these will be used to send marketing messages if there is a message set for any of the channels selected. You can also set the frequency of the communication, as in this example the frequency is set to “Send me emails twice a day” but pause them during the “1st of november 2016 to the 30th of november 2016”. Email is also set as the preferred channel, so if the same message is set for both email and sms, it will only send the email version of the message to the selected contact.

Contact Categories

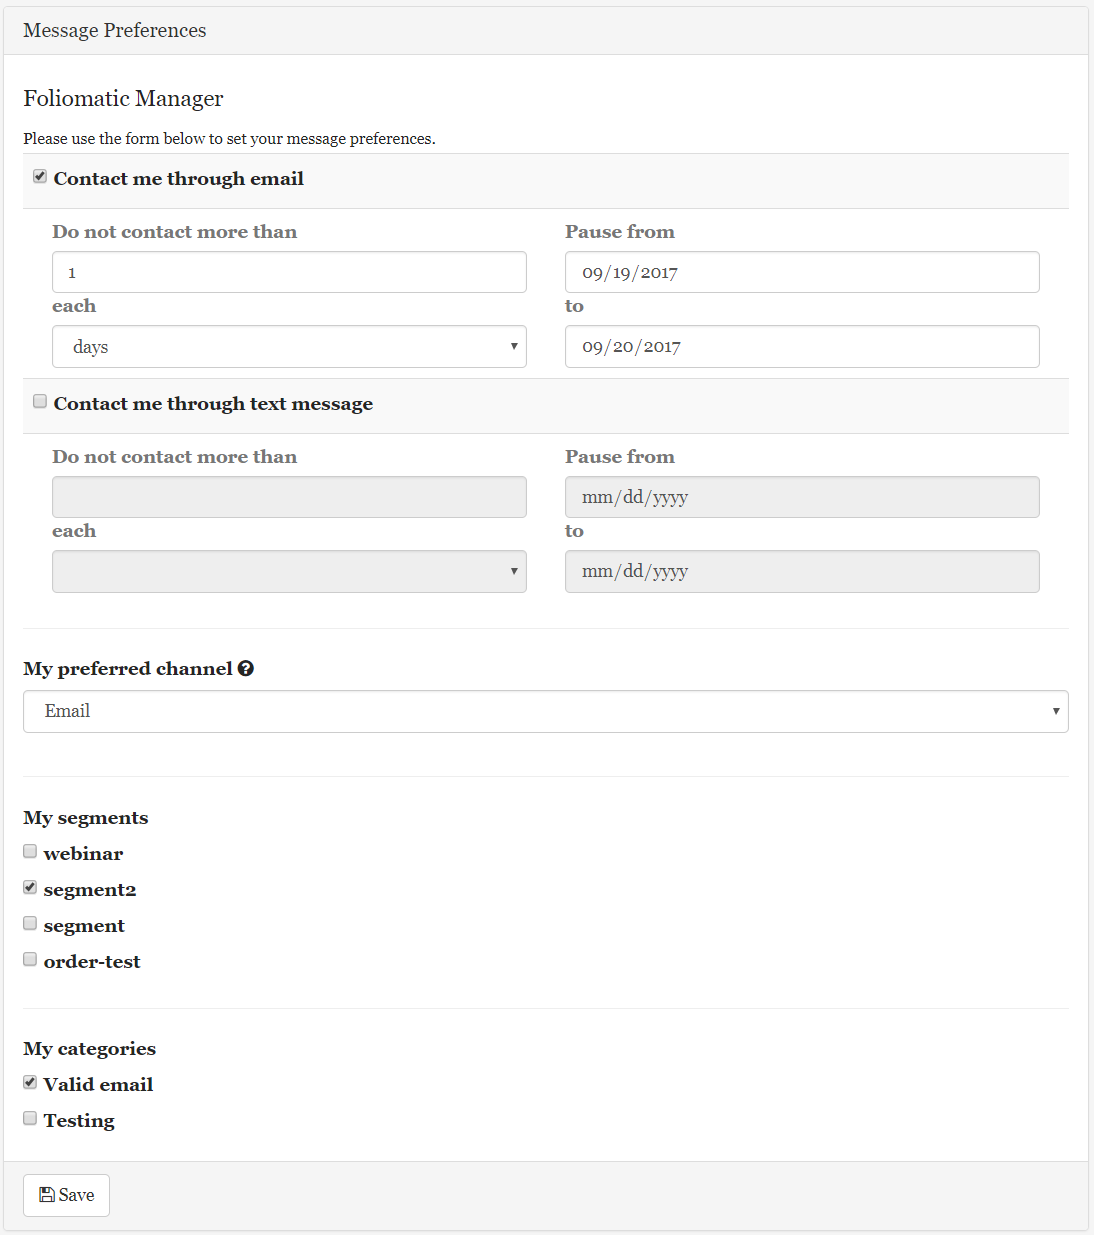
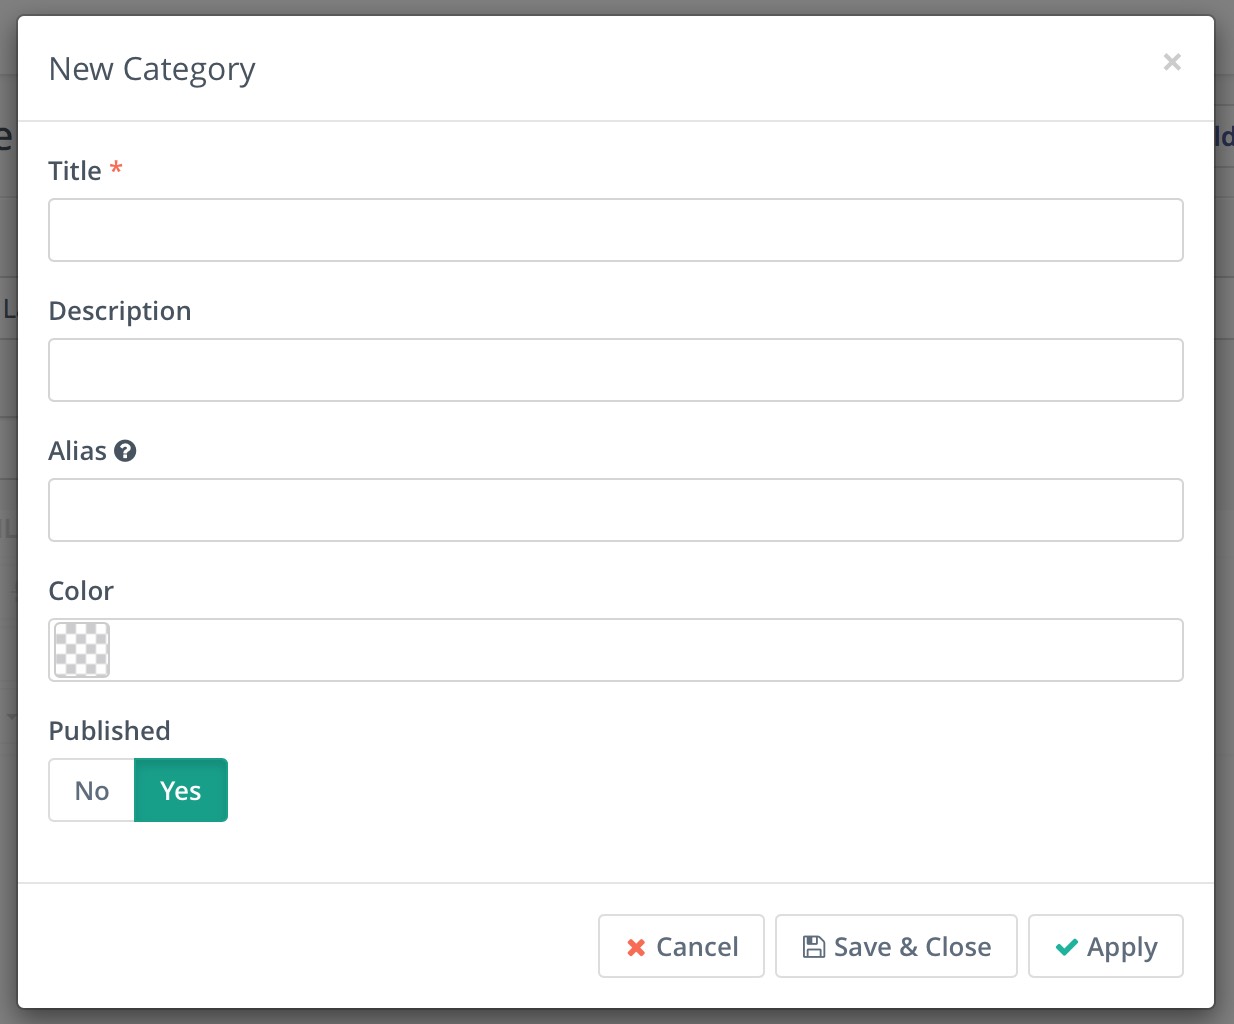
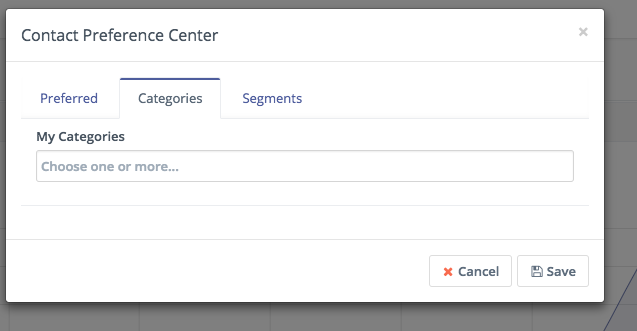
Use the categories tab to add or remove a contact from a global category. Global categories can be used in areas like emails, text messages, campaigns. In combination with the new Subscribed Categories segment filter, contacts can be given the choice to opt out of categorized communications.

Contact Segments

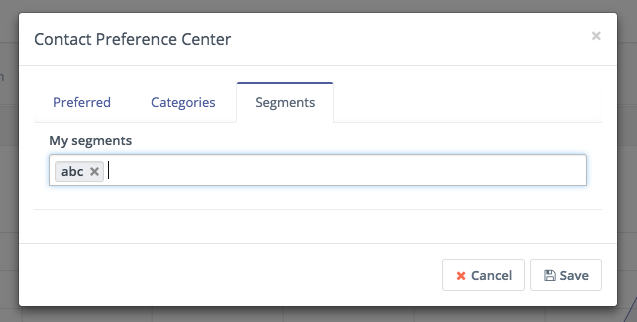
Use the segments tab to add or remove a contact from a segment. Segments are used as a source for campaigns and emails. Any contact in a particular segment will be part of a campaign that has that segment as the source. You can also use a standalone email manually to a segment. If a user has opted out of a segment it will no longer receive campaign actions or messages sent to that segment.

Contact’s Unsubscribe Email Preferences

The contact’s preferences can be presented to the user in the unsubscribe page by selecting “Show contact preference settings” in the email configuration. You may also choose to hide or show different segments of the user preferences. If any of these areas is set to no, it will hide it from the contact’s personal preferences page. The default unsubscribe message is shown if the preference setting option is set to no.

You can also Customize the preference center page for individual emails

4.6.1 Customize Preference Center

It is possible to customize the personal preference center/unsubscribe page and edit text labels, format and apply themes using the landing page builder.

Creating a Preference Center Page

When creating/editing a landing page, there is a toggle button labeled Is preference center , toggling this button shows/hides the preference center slots in the builder

image

These slots in the builder are used to customize the page:

image

Optionally, you can use tokens to insert the different slots. Keep in mind that if you use tokens, you lose the ability to customize the labels and styles of the slots because it uses the default ones.

image

To finish, don’t forget to include a “save preferences” button, otherwise the preferences can’t be saved:

Save the page and the preference center landing page is ready.

Now in the landing pages list, the icon with the little cog indicates that the page is a preference center one.

image

When viewing a preference center page, there is a header indicating its purpose and the page URL is not available, only the preview URL.

Setting Preference Center Pages in Emails

When creating or editing an email, you can select the Preference Center Page from the list as shown:

image

Keep in mind that your mail must use the same langugage as the preference center landing page - if not, default preference center will be shown.

Now when the email is sent, all recipients will be able to click on the Unsubscribe link and the new preference center page will be displayed.

If no Preference Center page is selected in an email, the default page is displayed.

4.7 Message Queues

When a campaign marketing email is triggered or an email broadcast (segment email) and either a contact has a frequency rule defined or there is a default set in Configuration, the email may be sent to a queue to be processed.

Priority and number of attempts

  • You can select priority as High or Normal. All messages with priority high will be put in the front of the queue when processing messages for a given date. Broadcasts are always injected as normal priority.
  • Number of attempts will try to send email again if it has been rescheduled, note that even if an email is pending but if the number of attempts has been reached, the message will not be sent.

Processing a message queue

Messages are put into the queue with status pending, so all pending messages that have not met their max number of attempts will be processed using this command.

Setup your cron as followed:

php app/console mautic:messages:send

4.8 Companies

Companies are a way to group contacts based on the company(ies) the contact works or has worked for.

Merging Companies

When editing a company, you can merge this company into another existing company by using the Merge button.

Search for the company you wish to merge into and the fields from the current company that are not populated in the selected company will be copied to the selected company. Contacts that are not in the selected company will also be transferred.

After the current company has been merged into the selected company, you will be redirected to the selected company and the old company will be deleted from the database.

Company Custom Fields

With Mautic’s installation a set of custom fields is provided for companies, but you can customize these fields to your needs.

  1. Go to custom fields and create any company field you need.
  2. Go to the right select box to assign this field to ‘Company’.

Company Segments

You can create a segment based on a company record, simply select any company field to filter with and the matching criteria for it, and contacts that match any company filtered will be added to the segment.

Identifying Companies

Companies are identified strictly through a matching criteria based on Company Name, City, Country (and/or State). If city of country are not delivered as identifying fields to identify a contact, a company will not be matched or created.

Campaign Company Actions

A contact can be added to a new company based on a campaign action

Create/Manage Companies

To create or manage companies, go to the companies menu identified by the building icon. In this area you can create, edit or delete companies.

Assigning Companies to Contacts

There are different ways to assign a company to a contact, all explained next:

Contact’s Profile

You can assign a contact to companies in the contact’s profile page when creating or editing an existing one. The latest company assigned will be treated as the primary company for the contact.

Contacts List View

You can batch assign companies to selected contacts in the contact’s list view.

Through a Campaign

You can assign a company to identified contacts through a campaign by selecting the ‘Assign contact to company’ action.

When Identifying a Contact Through a Form

If a contact is identified through a form a company can also be identified/created if: -Company name is selected as a form field (mandatory for company matching/creation). -City is selected as a form field (mandatory for company matching/creation). -Country is selected as a form field (mandatory for company matching/creation). -State is selected as a form field (optional for company matching/creation).

Company Scoring

A companies score can be changed through a campaign action or a form action. When one of these actions is selected, first a contact must be identified, and the companies assigned to that contact will have their score changed.

  1. Select contact’s Change company score action in either a form or a campaign
  2. Once a form is submitted or a campaign is triggered it will identify companies identified in the campaign or form to change its score.

Setting Primary Company

As of 2.3.0, it is now possible to set primary company through the contact details page.

5. Components

The Components menu contains the following items:

  • Assets
  • Dynamic Web Content
  • Forms
  • Landing Pages

These items must be created before you can use them in a campaign.

5.1 Assets

Assets are those items which you will provide to your contacts typically upon completion of a form. These assets are trackable items and can carry their own point values, history, and tracking statistics.

Example Assets

A few common examples of assets include:

  • a white paper provided in regards a particular product or service
  • a downloadable demo application or other digital product;
  • any file of interest to the contact such as video, mp3, presentation, etc.

5.1.1 Manage Assets

Categories

Assets can be organized in categories, which allows you to easily locate resources. To create a new category, browse to the Categories section in the admin menu.

Creating categories

To create a new category, click on ‘New’ which can be found in the top right of the screen.

Name the category something that reflects the ‘filing system’ structure that will be used, and provide a short description of the category.

The alias field will be automatically populated from the title field unless manually specified. This creates the URL path so it should contain hyphens instead of spaces.

It is possible to color-code individual categories by either typing in a hex code, or using the picker to select the color.

To publish a category and make it available for assigning assets, ‘yes’ should be highlighted - if the category should not be published click on ‘No’ to set the category as unpublished.

To save the changes and continue editing, press ‘Apply’. To save the changes and go back to the categories screen, press ‘Save & Close’. To cancel changes and return to the categories screen, press ‘Cancel’

Editing categories

To edit a category, either click on the category name, or click on the arrow beside the checkbox and select ‘edit’. The same screen as above will be displayed, however the fields which have previously been populated will already have content - which can be edited and saved as above.

Managing categories

Categories can be sorted by title or ID. Click on the column header to search by the required field - clicking again will reverse the sort order.

At the bottom of the page, a dropdown allows control over the number of categories displayed per page - if this number is exceeded by the amount of categories, the pagination arrows can be used to move between pages. To change the number of categories displayed, select the desired number from the dropdown and the page will automatically refresh.

Deleting categories

Categories can be deleted by clicking on the arrow beside the checkbox and selecting delete. If any assets are currently assigned to the category being deleted, they will not be removed, but will instead display as ‘Unassigned’. A warning will be displayed which alerts you to this fact when deleting a category.

Assets

Assets are often provided as incentives to complete a form, and may include white papers, infographics, videos, mp3’s and so forth. These are made available within Mautic as a downloadable file which may be instantly downloaded on submission of a form, or provided as a link from which it can be accessed.

Before creating an asset, first establish and publish any categories that may be needed. It is not possible to assign assets to unpublished categories.

Navigate to ‘Components’ -> ‘Assets’, and click ‘New’ to begin creating an asset.

Assets can be added from local resources on a computer or from a remote location. Local uploads will be restricted by size due to the settings of your server - any such restriction may be advised as a warning above the file upload area.

Uploading an asset

To upload an asset, either drag the file into the white box, or click in the white box to open a file upload window. On selection of the file, it will be automatically uploaded and will appear in the white box.

The title of the asset can be set, along with a description and an alias as above with categories. Assets can only be assigned to published categories, therefore the dropdown list for category selection will not feature unpublished categories. It is also possible to set the language, whether the asset is published or unpublished, and whether it should become published or unpublished at a specific date or time.

When the details have been completed, click ‘Save & Close’ or ‘Apply’ to save changes to the asset.

Viewing an asset

Once an asset has been uploaded and saved, it can be viewed by clicking on the asset name in the list of assets.

The view asset screen gives information about the number of times the asset has been downloaded, which can be displayed on a chart by hourly, daily, weekly, monthly or yearly downloads. The graph also shows the number of unique, versus total views - this is an indication of whether the same asset is being downloaded multiple times by some visitors.

A download URL allows previewing of the asset - clicking on the link will open the asset in a new window.

Below the preview link will be displayed recent activity for this resource, with a preview of the resource being available beneath the chart for some formats.

Editing an asset

An asset can be edited by clicking on the ‘edit’ button while viewing the asset, or by selecting the arrow next to the checkbox for the asset, and selecting ‘edit’. The edit screens are the same as the view screens, however content will be populated in the fields.

Deleting an asset

An asset can be deleted by clicking on the ‘delete’ button while viewing the asset, or by selecting the arrow next to the checkbox for the asset, and selecting ‘delete’. A confirmation screen will be displayed, prompting confirmation that the asset should be deleted.

Once an asset has been deleted, it cannot be retrieved, and statistics relating to the number of downloads for that asset will no longer be available. Contact points that may have been accumulated as a result of accessing the resource will remain. It is recommended where possible to un-publish assets which are no longer in use - in future there may be an archive feature.

5.2 Dynamic Web Content

Mautic 2.0 introduced the ability to embed content on a web page dynamically for both anonymous visitors and known contacts.

There are 2 types of Dynamic Web Content items (or DWC):

Filter based

This feature allows you to configure filters (like in segments) so a Landing Page with a DWC token or slot can show content based on specific conditions.

Setup

  1. Create or edit a Dynamic Web Content item.

  1. Toggle the " Is campaign based " button to No (Notice how when No is selected, the " Slot Name " field is available and the filters tab is displayed so new filters can be created.

  1. On a landing page, add a token or a slot for the new dynamic web content you just created.

  1. When using DWC slots, you need to provide the requested slot name.

  1. When someone visits the page and if the conditions on the filters are met, the DWC will be displayed.

  1. To add a DWC item with filters in a third party page, you can use the following code (just change myslot in data-param-slot-name="myslot" to the Requested Slot Name of your DWC item):
<div data-slot="dwc" data-param-slot-name="myslot">
  <h1>Dynamic web content for myslot</h1>
</div>
  1. Again, when someone visits the page the DWC slot will be replaced if the filters match:

Campaign based

There are several steps involved in setting this up.

Add the default content.

Add alternative content if desired.

You can set up as many items as you need. The default will be delivered via the “Request Dynamic Content” decision in a campaign. If you want to push something different based on a set of criteria, you create those here and deliver them via a “Push Dynamic Content” action.

Add the dynamic content pull request in a campaign.

The key to this step is naming the “slot”. This can be anything you want as long as it’s unique across your dynamic content campaigns. The pull request is processed and determines if the person on the landing page is a known contact.

Add the push request in the campaign.

If you want to serve up different information based on certain criteria, you can use a push request.

  1. If the person is known, they receive the content from the pull request.
  2. If they meet the criteria (in the example below - if they are from Canada), a different set of content can be delivered to the browser.
  3. If they are unknown, they will see the information embedded in the dynamic web content div from the page (see below).

Finally, include the dynamic web content shortcode in your web page.

<div data-slot="dwc" data-param-slot-name="dwc">
  <h1>Dynamic web content for myslot</h1>
</div>

Note the data-slot-name matches the slot name in the campaign.

Watch a video tutorial: (Mautic 2.0 Update - Dynamic Web Content - YouTube)

Translations

Dynamic web content supports translated content. When creating/editing a dynamic web content item, there are the options to set a language and select a translation parent. By selecting a translation parent, the current item is then considered to be a translation in the selected language of that parent item.

Tokens

Dynamic web content supports these tokens:

  • Contact Fields - example {contactfield=firstname}
  • Page Link - example {pagelink=1}
  • Asset Link - example {assetlink=1}
  • Form - example {form=1}
  • Focus Item - example {focus=1}

5.3 Forms

Forms are a special part of the marketing automation system. A form is used to collect user information often in exchange for providing access to a download, an event registration, or an email newsletter. Forms allow you to collect contact data and add additional information to their profile.

There are two kinds of forms in Mautic.

A Campaign Form can push a contact directly into a campaign but all actions are performed in the Campaign Builder.

A Standalone Form can push a contact into a segment, but not into a campaign directly. The advantage to this form type is that you can perform actions at the time of submission. An example of this would be sending an email to an administrator with the form values included.

Form Troubleshooting

Form error messages does not show up or form redirect is not working

This is usually caused by URL mismatch. You can confirm this by going into the form preview page. Open the browser dev tools by pressing F12 on Windows or Linux or Option+Command+I on Mac. Go to the console tab and you should see 404 error on form JS.

To fix that, go to the Mautic Configuration and make sure the Site URL field is the correct Mautic URL root address (the one you see before the /s/config/edit part in the browser address bar) including the http:// or https://. Save the configuration.

Now go to the Components / Forms and rebuild the forms HTML.

The 404 error should disappear after refres of the form preview page and the form validation messages should start working again.

5.3.1 Manage Forms

The new form view lets you create a form and attach any fields you want to collect from your users. After you’ve created the fields you can then define what actions you want to perform after the user submits the information.

Form Overview

The form overview provides a quick overview of the submissions received over a time period to easily analyze how successful a particular form is. The bottom of the form overview outlines the fields and actions included as part of a particular form.

Form Fields

A form can contain as many fields as needed. These fields can be laid out dynamically by the system or handled via HTML if you want more control.

Page Breaks

Page breaks is a new feature in 2.2.0 that allows multi-paged forms. Note that the submission does not happen till the final page and the submit button is pressed.

Each page break will add a customizable continue/back button that will navigate to the next or previous page. If a page break is added after the submit button, the continue button will be replaced with the submit button itself when the form is generated.

Form Actions

Form actions are items to be handled on the submission of the form. You can define multiple actions to be performed on each submission. As of 2.2.0, different actions are available based on form type.

Form Re-Post Action

Results from a Mautic form can be re-posted to a 3rd party form using the new “Post results to another form” submit action.

An email can be configured to send the results if the form fails to forward.

Each form field can be have it’s name customized to match that of the recipient form/script.

In addition to the form data, an array of mautic_form with details like ID, name, and the URL the form was submitted to (if available) along with mautic_contact with the details of the contact that submitted.

Creating and Updating Contacts and Companies with Forms

To have your form create or update contacts (in order to update, there must be a matching unique identifier). Each form field can be mapped to a custom contact field through the form’s Contact Field tab. Some fields result in automatic matching such as email and country.

As of 2.10.0 you are now able to match form fields with company fields in order to create a company and link it to the contact created through the form. You will only be able to create a company if the company name field is populated. It will update the company if it can identify it through Company Name and Country, City and State.

As of 2.2.0, for fields that include select lists (select, radio, checkboxes), options can be synced with the contact field itself. No more having to manually keep them in sync! If a custom field’s list is updated, simply rebuild the form’s HTML.

Kiosk mode

The kiosk mode is helpful when you know that some form will be submitted from one device by multiple contacts. For example like a kiosk at a conference. When the kiosk mode is turned on, each submission will create a new contact. When kiosk mode is turned off, Mautic will edit the contact which belongs to the current session.

Form Injection

There are three ways you can use the form. You can copy the entire output or you can have the form injected dynamically using the provided javascript. These are two options for directly including the form on a page, you can alternatively embed the form directly in a Mautic landing page if you choose.

It is recommended not to paste the injection code twice, it risks creating troubles on the submit form action when mandatory fields are submitted empty.

Form results

When on the form overview page you can click the Results button located in the top right to open a tabular view of all form submissions. These results can be easily filtered and sorted by each column heading.

Form Preview

The form preview provides a popup overview of what the form will look like. Remember that form styling is controlled by the surrounding page or website content and thus will display differently in final layout than in the preview.

Form Style

It is possible to choose a theme for a form. If you do so and the theme supports this feature, the form will be styled by CSS from that theme.

Pre-populate a form field value

It is possible to pre-populate the value of a form field from the URL query parameters.

The contact field’s alias can be obtained from the table when viewing Contacts -> Manage Fields. The form field’s name is stored as the alias in the database and is auto generated from the field’s label; you may have to look at the source of your form to get the exact name (open the form and click the preview button). For example, here is a sample html section taken from a form. The name to use is what’s within mauticform[FIELDNAME] .

<div class="mauticform-row mauticform-email mauticform-row-email" id="mauticform_email">
    <label id="mauticform_label_email" for="mauticform_input_email" class="mauticform-label" "="">Email</label>
    <input id="mauticform_input_email" name="mauticform[email]" value="" class="mauticform-input" type="email">
</div>

Pre-populate the values automatically in an email

Embed the tokens {leadfield=FIELDALIAS|true}, one for each contact specific information you want to pre-populate the form with, into the URL, assigning them to the name of your form field.The |true tells Mautic to URL encode the value so that it works in the browser.

{pagelink=1}&email={leadfield=email|true}

In the rendered email sent to a contact, the URL may be converted into something like:

http://my-mautic.com/my-landing-page?ct=A_REALLY_LONG_STRING&email=contactemail%40gmail.com

So, what happened is {pagelink=1} was converted into the landing page URL and had ?ct=A_REALLY_LONG_STRING appended. The really long string is encoded information about the contact which includes the contact ID. Each {leadfield=FIELDALIAS} was replaced with the contact’s data. When the contact clicks the link, they will be taken to the landing page with the embedded form, and the form’s ‘email’ input will be pre-populated with the value passed through the URL.

Remove Contact from Do Not Contact (undo unsubscribe)

Mautic 2.3 added new action Remove Contact from Do Not Contact . If a contact unsubscribes from your email marketing, you can’t send another emails. Use action Remove Contact from Do Not Contact in your forms and the contact will receive email again.

5.3.2 Progressive Profiling

This feature was added in Mautic 2.1.0.

Progressive profiling makes your forms smarter by asking for the most important information that you don’t have yet. This way your contacts won’t feel overwhelmed by long forms and saves time by answering questions Mautic already knows the answer to. Progressive Profiling lets you improve the form conversion rate.

Configuration

There are 2 possible ways that you can configure a form field to display only when needed. The configuration is in the Behavior tab in the field configuration form. The Behavior (Progressive Profiling) can be configured for all field types except the button field. We recommend use email field visible because it is the identifier of a contact. The button field must be always visible because otherwise the form couldn’t be submitted.

It’s recommended to use the email field in each form. From Mautic 2.9 email can be hidden, but be aware of that. Email as identifier of a contact could be unusable if same PC is used by more people (public library, schools…).

1. Display field only if the value is not known yet

Mautic will search for a value in 2 places before the form is rendered for the current contact:

1.1 Former form submissions

Mautic will search for the field value in the former form submissions of the current contact. If a value is found, the field might be hidden if configured so. There are limitations of the search history. Read about them below.

1.2 Contact profile values

If the form field is linked with a contact field, Mautic will check if there is a value in the contact’s profile and hides the field if configured so.

2. Display field only after X submissions.

If you want to ask a contact additional questions on the second form load, you can specify so for each lead. It works nicely with hiding fields which you already know the answer to. For the first submission, the contact can be asked to fill in the First and the Last name. When she comes the second time, the First and the Last name fields will be hidden and instead she’ll be asked to fill in her Company and Phone.

Limits of Progressive Profiling

The search history limit

The Mautic forms without progressive profiling are as fast as it can be. The HTML of the form is rendered once, stored and this “cached” HTML is used for the next form loads. When a progressive profiling configuration is turned on on any of the form fields, the form HTML might be different for each contact. It can even change for each contact after each submission. That’s why the caching technique cannot be used anymore and the form load time will be slower for a progressive profiling form.

There is limit of 200 submissions from which Mautic searches for existing form values. This limit was added to prevent possible slow form loads or even hitting the server time or memory limits when a contact has several thousands of form submissions. This limit might cause Mautic to display/hide the wrong fields.

The embed type limit

Progressive Profiling forms will not work if you embed your form as static HTML. It will work at form preview, form public page, form embedded via JS, form embedded via iframe.

The kiosk mode limit

Progressive Profiling features are turned off if you switch the form to the Kiosk Mode. The form always creates a new contact on each submission in the Kiosk Mode. It doesn’t track the device from which the form was submitted.

The Progressive Profiling options under the Behavior tab will still be accessible in the Form Builder so you could easily switch the Kiosk mode off and use the Progressive Profiling features again.

5.3.3 Gated Video

This new inbound channel was added in Mautic 2.1. It allows Mautic users to embed gated videos in their websites, landing pages, and anywhere else the mautic tracking javascript is installed. In Mautic, a gated video is one that plays for a set amount of time then pauses the video in order to show a form that, when submitted, will capture the lead information then continue to play the video from where it was paused.

Using Gated Video

Gated videos are not an entity within Mautic; they do not have a menu item. Gated videos can be embedded in your landing page content or in your website that has the Mautic tracking javascript installed.

jQuery and Vimeo’s Froogaloop javascript libraries are required for this feature to function. They will be automatically inserted into your landing page if videos are detected.

Any <video> tag found by the javascript that has a data-form-id and data-gate-time attribute will be treated as a gated video by the Mautic javascript. The simplest way to embed a gated video is to embed the HTML below on a page where the Mautic tracking javascript is installed.

Keep in mind that you should replace the form id with a valid form id from your Mautic installation and that gate time should be set to the desired time (in seconds) when you would like to pause the video after it has started to play. The type attribute on the <source> tag can be one of video/youtube , video/vimeo , or video/mp4 . When using video/youtube or video/vimeo , you can use the URL found in your browser address bar as the URL to place in the src attribute. When using video/mp4 , you must use the full URL to the actual mp4 file location in order to use the gated video feature.

<video width="640" height="360" data-form-id="1" data-gate-time="15">
    <source type="video/youtube" src="https://www.youtube.com/watch?v=QT6169rdMdk" />
</video>

If the form you’ve chosen to display has the Successful Submit Action set to Display Message and you’ve entered text into the Redirect URL/Message text box on the form edit screen, that message will be displayed for 3 seconds.

To use a gated video on your landing page, simply click into a textarea in your template builder, and you will see the Froala editor pop up. In the top row, next to the Insert Image icon, is the Insert Gated Video icon. Click that, and you can then use the modal that opens to insert gated videos into your landing page.

Tracked videos (Mautic 2.9.1 and above)

Mautic allow track contacts play/stop/time length action without gated feature. Any <video> tag found by the javascript that has a data-mautic-video="true" attribute will be treated as a tracked video by the Mautic javascript.

<video width="640" height="360" data-mautic-video="true">
    <source type="video/mp4" src="https://example.tld/video.mp4" />
</video>

CMS Plugins

The gated video feature of Mautic is simplified by using one of our CMS plugins. We have CMS plugins for WordPress, Joomla, Drupal, Grav, and Concrete5. When using the CMS plugin to embed video content, be sure that you have installed the latest version of the plugin for your CMS of choice. Once installed, you can use the syntax below to embed gated videos into your content.

WordPress, Grav

[mautic type="video" form-id="1" gate-time="15" src="https://www.youtube.com/watch?v=QT6169rdMdk" width="640" height="320"]

Drupal, Joomla

{mautic type="video" form-id="1" gate-time="15" src="https://www.youtube.com/watch?v=QT6169rdMdk" width="640" height="320"}

5.4 Landing Pages

Pages within Mautic are a powerful tool for quickly creating compelling content with a single focus. Use pages for directing contacts through a form or providing a way to download an asset, or merely tracking interest in a particular subject.

Features of Landing Pages

There are many great features with Mautic landing pages. These pages allow you to create an A/B testing environment (more on this later), multilingual pages, and templated pages unique to a variety of pre-defined templates.

5.4.1 Manage Pages

Page Details

When viewing a page within Mautic you can find a tremendous amount of information on a single page overview.

You can see the page description at the top below the page title. Quickly see charts with the page views, new vs. returning visitors, and the average time on page. These charts are updated in real-time based on traffic.

On the right you will find a link which you can use to preview the page and a list of recent activities that are related to the page.

Notice when viewing the page details you can select the Details tab located just below the description to expand the area and see more specific details.

Translations and Variants

As mentioned previously when viewing the page details you can also view the various translations and page variants which have been created. These variations are also useful when performing A/B testing.

When creating/editing a landing page, there are the options to configure a language and translation parent. By selecting a translation parent, the current item is then considered to be a translation in the selected language of that parent item.

If the contact has a preferred locale or browser set in an available translation, and that translation exists, the translated landing page will automatically display for that contact. A contact’s preferred locale is automatically gleaned from the browser’s settings but can be overridden by editing the contact’s preferred locale profile field.

It is also possible to have translations of A/B test variants.

New/Edit Pages

The page form allows you to create new pages and offers a number of fields for your convenience. You will notice most of them in the following screenshot. In particular you will notice the Page Builder button on the top toolbar. This is where you will launch the page builder to easily create your page layouts.

Every part of the template is editable via drag and drop. Click in a text box to edit. Click on an image to replace. Once you’re happy, just click “Close Builder” and you’ll see a representation of the page.

You can fine tune any aspect of the page via the Content tab and Source Code view. You can even paste your own HTML inside.

You are also able to define a template to use with your page as well as the language of your page. Notice the convenience field where you can define the parent page as well. This allows you to link pages.

The page builder provides quick and convenient access to assets, other landing pages, and forms. All those are accessible via tokens in format {component=item} , for example {form=4} . A drop-down with options will appear when you type { character and you can search for the right token by typing its name. For example if you type {for , it will suggest the right token for a form which has “for” in its name and you can select it via keyboard or by clicking on it.

Since Mautic 2.7.0, the builder will let you drag the predefined content sections from the right hand toolbar and drop them to the position you choose. It’s possible to select from layout of 1, 2 or 3 columns. The existing sections can be re-ordered or removed.

Code Mode

Go to the Code Mode docs.

Unpublish a page

The pages can be unpublished and published again with a click of a button or by setting publish/unpublish date in the page configuration. Unpublishing a page means that contacts will see the 404 message (page not found) instead of the page itself.

Redirect when a page is unpublished

Mautic allows you to configure a 301 (permanent) or a 302 (temporary) redirect. The redirects will work if the page is unpublished.

Note: When you are logged in as a Mautic administrator, you will always see the page content even though it is unpublished. But if you log out of Mautic or open the page in an incognito window to emulate access of a normal contact, you will be able to see the 404 message or the redirect if configured.

5.4.2 Page Troubleshooting

Page hit tracking doesn’t work

Page hits are being tracked by a tracking pixel. That is simply a 1 pixel GIF image in the source code of the Page source code. When a page is hit by a browser, it tries to load the images in it. The image load request is actually what Mautic needs to track the page hit action.

If the tracking doesn’t work, check:

  1. The tracking doesn’t work for logged in Mautic administrators. This way statistics aren’t skewed by Mautic administrators looking at the page result while editing a page. So make sure you are logged out of Mautic or use an incognito browser window while testing the tracking.
  2. The tracking pixel isn’t part of the page you want to track. Mautic can only track pages which have the tracking pixel in their source code.
  3. The tracking pixel is not configured correctly. You can confirm this by looking at the dev tools of your browser. While looking on the page you wish to track, open the dev tools (press F12), go to the Network tab and reload the page. You’ll see all the requests which were made. Filter those requests to images only and find the mtracking.gif image. Does it have status 200? If not, the path to your Mautic instance is probably incorrect.

Info about the Tracking Pixel

5.4.3 Mautic - Device Granularity

Mautic records devices used to visit pages and open emails.

Requirements

To detect devices Mautic uses (GitHub - matomo-org/device-detector: The Universal Device Detection library will parse any User Agent and detect the browser, operating system, device used (desktop, tablet, mobile, tv, cars, console, etc.), brand and model.). Please be sure you have this library installed in your Mautic instance.

Test this feature

For Mautic pages and emails

Every page and email created with mautic should detect the device used to view a page or open an email. Emails need to be sent from a public instance of mautic in order to test open actions, or you can copy the tracking pixel URL and paste it in an incognito window of your browser to test in a local server.

For Non-Mautic pages and emails

Any page or email that has Mautic’s tracking pixel should detect the device used to view a page or open an email.

How to use this feature

  • You should see devices used to view pages in the contact’s timeline
  • Life cycle chart displays a graph of devices used by contacts in a particular segment
  • Email details display a pie chart of devices used to open an email next to the statistics graph
  • Reports of devices used per contact is now part of the reports bundle

6. The Channels Dropdown contains:

All of these must be created or configured before you can use them in a campaign.

6.1 Emails

Emails can be created to be used within campaigns and other list activities. Emails provide a means for direct interaction with potential customers, clients, and contacts.

Email Types

There are two types of emails: template and segment (broadcasts).

Template Emails

Template emails are transactional by default and can be used in campaigns, form submit actions, point triggers, etc. These can be sent to the same contact as many times as needed. These cannot be sent to a contact outside of another Mautic component except when sending an email directly to a contact in which the content is cloned (template emails sent directly to a contact are not associated with the template email itself and thus stats are not tracked against it).

Segment (Broadcast) Emails

These are marketing emails by default. Segments are assigned to the email which will determine which contacts receive the communication. Note that each contact can only receive the email once - it’s like a mailing list.

Initiating these emails can be done in one of two ways. Prior 2.2.0, sending had to be manually initiated through the UI as an ajax process batched over the contacts. As of 2.2.0, a new cron job is available to do this for you! See Send Scheduled Broadcasts (e.g. segment emails) for more details on this.

Email Formats

Emails can be created in both full HTML as well as basic text format to be delivered as necessary to contacts. This is an important part of creating a strong relationship with contacts by providing relevant information in the correct format.

Email Delivery

Emails are delivered using the method defined by the system administrator. If you are the system administrator for your company, then you will need to add the email protocol for your company to use. Mautic integrates with any email service provider which offers SMTP mail servers as well as several distinct services such as Mandrill, GmailSendgrid, Mailjet, Postmark, Sendmail and Amazon SES.

The system can either send emails immediately or queue them to be processed in batches by a cron job.

Immediate Delivery

This is the default means of delivery. Mautic sends the email as soon as it is instructed to by the triggering action. If you expect a large number of emails to be sent, then utilizing the queue is recommended. Sending email immediately may slow the response time of Mautic if using a remote mail service since Mautic has to establish a connection with that service before sending the mail. Also attempting to send large batches of emails at once may hit your server’s PHP limits or email limits if on a shared host.

Queued Delivery

This is recommended if you plan to send a significant number of emails. Mautic will store the email in the configured spool directory until the command to process the queue is executed. Set up a cron job at the desired interval to run the command:

php /path/to/mautic/app/console mautic:email:process --env=prod

Some hosts may have limits on the number of emails that can be sent during a specified timeframe and/or limit the execution time of a script. If that’s the case for you, or if you just want to moderate batch processing, you can configure batch numbers and time limits in Mautic’s Configuration.

Email Fields

You have access to any number of contact fields to be used in your form emails. These can be easily placed within your emails and will be automatically replaced with the appropriate text once the email is sent.

Tracking Opened Emails

Each email sent through Mautic is tagged with a tracking pixel image. This allows Mautic to track when a contact opens the email and execute actions accordingly. Note that this technology is limited to the contact’s email client supporting HTML and auto-loading of images. If the email client does not load the image, there is no way for Mautic to know if the email was opened.

Tracking trackable links in emails

Clicks of each link in an email are tracked and those clicks count can be found at the bottom of email detail page under Click Counts tab.

Unsubscribing

Mautic has a built in means of allowing a contact to unsubscribe from email communication. If using the builder, simply drag and drop the Unsubscribe Text or Unsubscribe URL tokens into your email. Or insert {unsubscribe_text} or {unsubscribe_url} into your custom HTML. The unsubscribe text token will insert a sentence with a link instructing the contact to click to unsubscribe. The unsubscribe URL token will simply insert the URL into your custom written instructions.

Online version

Mautic manages also the hosting of an online version of the email sent. To use that feature, simply add the following as URL on text to generate the online version link {webview_url} .

6.1.1 Manage Emails

Email Overview

The email overview allows at-a-glance information regarding the success or failure of a particular email. You can quickly see relevant information in regards to opens, bounces, successful click-throughs and other important statistics.

Email Creation

Email creation can be handled through the graphical email builder with little to no HTML knowledge. Emails are assigned to particular segments and/or campaigns. Below are some key steps to be performed when creating an email.

Translations

When creating the email, an option is given to assign a language and a translation parent. By selecting a translation parent, the current item is then considered to be a translation in the selected language of that parent item. If a contact has a preferred language set, they will receive the translated version in their preferred language if it exists. Otherwise, they will receive the parent in the default language.

It is also possible to have translations of A/B test variants.

Segments

When creating an email you can select the segments to which you want to send the email.

This entry field is a multi-select which allows you to choose several segments if necessary.

Email Builder

The email builder is a graphical user interface to create an HTML email through the use of drag-and-drop tools.

Since Mautic 2.7.0, the builder will let you drag the predefined content sections from the right hand toolbar and drop them to the position you choose. It’s possible to select from layout of 1, 2 or 3 columns. The existing sections can be re-ordered or removed.

The email builder provides quick and convenient access to assets, landing pages, and other extra fields which are considered important or commonly used. All those are accessible via tokens in format {component=item} , for example {contactfield=company} . A drop-down with options will appear when you type { character and you can search for the right token by typing its name. For example if you type {comp , it will suggest the right token for the Company Contact Field and you can select it via keyboard or by clicking on it.

A token can have a default value for cases when the contact doesn’t have the value known. The default value can be specified after | character like this: {contactfield=company|Default text}.

Tokens can be used also for the Subject line, but there is no drop-down. You’ll have to type it yourself or select it in the email body and copy-paste it to the subject field.

Email Builder has also special tokens for the Unsubscribe link and the Webview link:

  • {unsubscribe_text} - Creates a link with the unsubscribed URL and the text defined in the Mautic configuration.
  • {unsubscribe_url} - Creates a URL to the unsubscribed page which can be used in a link’s href attribute.
  • {webview_text} - Creates a link with the webview URL and the text defined in the Mautic configuration.
  • {webview_url} - Creates a URL to the webview page which can be used in a link’s href attribute.

Code Mode

Go to the Code Mode docs.

Base64 Encoded Images

Since Mautic 1.4, there is a new option in the Mautic configuration, the Email Settings tab. You can let Mautic encode all images in the email text as base64. It will attach the image inside the email body. It has several implications:

  • The main idea with this option is that most of the email clients will display the images directly without any approvals.
  • However, some email clients like Gmail will require the approval because of the tracking pixel and won’t display the base64 encoded images anyway. See the next paragraph for possible solution.
  • The email body will increase significantly if the email contains many and/or big images. Some email clients like Gmail will “clip” such email and won’t display it directly.

Disable the Tracking Pixel

As described above, some email clients display the image approval if one of the images is loaded from remote location. Like the tracking pixel. If you care more about this approval than the email open tracking, you can disable the tracking pixel. Then the images should be displayed directly without any approval.

6.1.2 Bounce Management - Monitored Email

Since version 1.2.0 Mautic has provided a feature which allows monitoring of IMAP accounts to detect bounced emails and unsubscribe requests.

Note that Mautic makes use of “append” email addresses. The return-path or the list-unsubscribe header will use something like [email protected] . The bounce or unsubscribe let’s Mautic note what type of email it is when it examines the inbox through IMAP. The abc123 gives Mautic information about the email itself, i.e. what contact it was it sent to, what Mautic email used, etc.

Some email services overwrite the return-path header with that of the account’s email (Gmail, Amazon SES). In these cases, bounce monitoring will not work. SparkPost, Mandrill, and Amazon SES (as of 2.2.0) support webhook callbacks for bounce management. See below for more details.

Monitored Inbox Settings

To use the Monitored email feature you must have the PHP IMAP extension enabled (most shared hosts will already have this turned on). Simply go to the Mautic configuration and fill in the account details for the inbox(es) you wish to monitor.

It is possible to use a single inbox, or to configure a unique inbox per monitor.

To fetch and process the messages, run the following command:

php /path/to/mautic/app/console mautic:email:fetch

Note that it is best to create an email specifically for this purpose, as Mautic will read each message it finds in the given folder.

If sending mail through Gmail, the Return Path of the email will automatically be rewritten as the Gmail address. It is best to use a sending method other than Gmail, although Mautic can monitor a Gmail account for bounces.

If you select an Unsubscribe folder, Mautic will also append the email as part of the “List-Unsubscribe” header. It will then parse messages it finds in that folder and automatically unsubscribe the contact.

Create a segment with bounced emails

This is not required, but if you’ll want to be able to select the contacts with bounced emails easily for example to delete all bounced contacts, create the segment with bounced emails.

  1. Go to Segments / New .
  2. Type in the segment name. For example Bounced emails .
  3. Select the Filters tab.
  4. Create new Bounced Email equals Yes filter.
  5. Wait for the app/console mautic:segments:update command to be automatically triggered by a cron job or execute it manually.

All contacts with bounced emails should appear in this segment.

Elastic Email Webhook

  1. Login to your Elastic Email account and go to Settings -> Notification.

  2. Fill in the Notification URL as http://your-mautic-url.tld/mailer/elasticemail/callback

  3. Check these actions: Unsubscribed, Complaints, Bounce/Error

Links

Elastic Email Help & Support Support via email

Amazon Webhook

Mautic supports the bounce and complaint management from Amazon Simple Email Service (Amazon SES).

  1. Go to the Amazon Simple Notification Service (SNS) and create a new topic

  1. Click on the newly created topic to create a subscriber

  1. Enter the url to the Amazon webhook on your Mautic installation

  1. The subscriber will be in the pending state till it is confirmed. AWS will call your Amazon webhook with a SubscriptionConfirmation request including a callback url. To confirm Mautic will send a request back to this callback url to validate the subscription. Therefore make sure your Mautic installation is allowed to connect to the internet, otherwise the subscription will remain in the pending state and won’t work. Check the logfile for more information.

  1. The last step is to configure Amazon SES to deliver bounce and complaint messages using our SNS topic.

Mandrill Webhook

Mautic supports a few of Mandrill’s webhooks for bounces.

  1. Login to your Mandrill account and go to Settings -> Webhooks

  1. Click Add a Webhook

Add Webhook

  1. Mautic 1.2.2 supports the following webhooks: Message is Bounced, Message is Soft-Bounced, Message is Rejected. As of 1.2.3, Message is Marked as Spam and Message Recipient Unsubscribes will be supported.

  2. Fill in the Post To Url as http://your-mautic.com/mailer/mandrill/callback then click Create Webhook.

  3. Click Custom Metadata and create two new metadata fields: hashId and contactId

Add metadata

Mailjet Webhook

Mautic supports Mailjet’s webhooks for bounces, spam and blocked. Before any configuration, you’ll need to create an account on Mailjet.

  1. Login to your Mailjet account and go to My Account -> Event tracking (triggers)

  1. On the event type list, select the one you want to link to your Mautic account

Add Webhook

  1. Mautic 2.2.0 supports the following webhooks: Message is Bounced, Message is Blocked, Message is Spam.

  2. Fill in the URL boxes as http://your-mautic.com/mailer/mailjet/callback .

Sparkpost Webhook

  1. Login to your Sparkpost account and go to Account -> Webhooks.

  1. Click the New Webhook button top right

  1. Fill in the Target URL as http://your-mautic.com/mailer/sparkpost/callback

  2. Select the following Events

SendGrid Webhook

  1. Login to your SendGrid account and go to Settings -> Mail Setting -> Mail Settings

  1. Fill in the Target URL as http://your-mautic.com/mailer/sendgrid_api/callback

  2. Select the following Events

Events

  1. Save setting (on the right side of “Event Notification” row:

6.1.3 Emails sent from owner email and name

It allows to automatically personalize emails sent to a user who has an owner (mautic user) assigned to it. This feature changes from email , from name and signature from the default setting to the user setting.

Requirements

  • Mautic 1.3.0+
  • A non-tokenized mail transport. This feature won’t work with emails sent via API (Mandrill, Sparkpost and Mailjet).

How to enable the emails sent from contact owner

  • Open the admin menu by clicking the cog icon in the top right corner.
  • Select the Configuration menu item.
  • Select the Email Settings tab.
  • Switch the Mailer is owner to Yes .
  • Save the configuration.

Signature

Signature is also a new feature in the Mautic 1.3.0. There are 2 places where to configure the signature text:

  1. The default signature is in the Configuration , Email Settings tab. The default text is Best regards,<br/>|FROM_NAME| . The |FROM_NAME| token will be replaced by Name to send mail as value also defined in the Email Settings tab. This signature will be used if the contact owner is not known.
  2. Every user can configure his/her own signature in the profile edit page. This signature will be used if the contact owner is known.

The signature can be placed into an email text by the {signature} token.

There is one exception where the contact owner’s signature won’t be used. When a user sends an email directly from a contact detail, the currently logged in user’s signature will be used. It doesn’t matter if the contact has another owner assigned or if it doesn’t have an owner at all.

FAQ

Does it work for all emails?

There are exceptions:

  • The email has to be sent to a contact. If Mautic doesn’t have a contact assigned with the email, it doesn’t know its owner and therefore cannot know what user name, email and signature to choose. This happens when you send the test emails.
  • If you send an email directly from the contact detail, the from name and from email will be used from the form, not from the user settings. Those values are pre-filled by currently logged in user name and email.

6.1.4 Email Troubleshooting

Open email tracking doesn’t get tracked

Emails are being tracked by a tracking pixel. This is simply a 1 pixel GIF image in the source code of email messages sent by Mautic. When an email is opened by an email client like Outlook, Thunderbird or GMail, the client tries to load the images in it. The image load request is what Mautic uses to track the email open action.

Some email clients have auto loading images disabled, and users have to click on a “Load Images” button to load images inside an email message. If the images aren’t loaded for this reason or another, Mautic doesn’t know about the open action. Therefore, email open tracking is not 100% accurate.

Email link clicks are not getting tracked

Before an email is sent, Mautic replaces all links in the email with links back to Mautic including a unique key. If the contact clicks on such a link, the contact is redirected to Mautic. Mautic tracks the click action and redirects the contact to the original location. It’s fast so the contact doesn’t notice the additional redirect.

If the email click doesn’t get tracked, make sure that:

  1. Your Mautic server is on a public URL. Tracking doesn’t work on a localhost.
  2. Make sure the email was sent to an existing contact via a campaign or a segment email. Emails sent by the Send Example link, direct email (from the contact detail) or form submission preview won’t replace links with trackables.
  3. Make sure the URL in the href attribute is absolute and valid. It should start with http:// or https://.
  4. You’ve opened the link in a incognito browser. More about it in the Pages troubleshooting.
  5. Check if the link in the email has been replaced by Mautic’s tracking link. If not, report it to https://github.com/mautic/mautic/issueswith all the details (Mautic version, PHP version, what the link URL is before sending, what it is after sending and so on).

Unsubscribe link doesn’t work

The unsubscribe link doesn’t work in test emails. That is because the test emails are sent to a Mautic user and not to a Mautic contact. Mautic users cannot be unsubscribed and therefore the unsubscribe link looks like this: http://yourmautic.com/|URL| . However, the link will work correctly when you send the email to a contact.

6.2 Web Notifications

Web notifications integrate One Signal. Using your own OneSignal accounts, you can now push a notification to your contacts’s browser (with their permission). Enable these in Mautic’s Configuration to see them listed under Channels in the menu.

For more information see One Signal documentation

Setup

1. Create One Signal account and app
2. Setup app Website Push Platforms in you app

Google Chrome and Mozilla Firefox configuration example

Apple Safari (macOS) configuration example

3. Setup Mautic

Enable Web Notification and copy keys from OneSignal to your Mautic > Settings > Configuration - Web Notification Settings tab

4. Test

All visitors with supported browser will be ask receive notification on all you Mautic landing pages. Create campaign and use Push Website notification action.

Options

Welcome Notifications

Option to allow disable welcome notifications. For more informations see One Signal documentation

gcm_sender_id

Option gcm_sender_id is a shared key used for push notifications. Use default value 482941778795. Previously it required your own key. Due backwards compatibility is editable (for older Mautic).

HTTPS and HTTP support

HTTP support was added in Mautic 2.6.

We recommend use https of your websites. But http suport for onesignal.com is very similar to https, nowdays. Just user subdomain options on onesignal.com and in your Mautic.

For more informations about http notification support read One Signal documentation

Support for Mautic landing pages and tracking pages

Support for tracking pages was added in Mautic 2.6.

Tracking page is your web page where you paste Mautic tracking code.

Don’t forget copy these files to root dir of your tracking page:

https://yourmauticurl.tld/manifest.json https://yourmauticurl.tld/OneSignalSDKWorker.jshttps://yourmauticurl.tld/OneSignalSDKUpdaterWorker.js

6.3 Focus

Focus allows you to engage users on your site through bars, modals, notifications and full page takeovers. These can be initiated at different times and with different actions such as exit intent.

Focus Items are listed under the Channels menu.

Creating a Focus Item

When creating a focus item, you’ll see that there is a place to enter a website. This is currently integrated into a service offered by mautic.com to generate a snapshot of the given website to use a preview when building the focus item. If the website is a very complex website - the snapshot may not work. Note that this feature may change in the future.

After entering the website, click the builder button top right. This is where the magic happens.

Notice that you should have a snapshot of the website. If not, you’ll have the option to fetch it. Again note that some complex websites may not be snapshot-able.

On the left, you’ll see a button to switch between mobile and desktop views. A mobile snapshot is also attempted - it may not match your website exactly due to the snapshot process but it should at least give you the general look. On the right is the builder toolbar.

Focus/Goal

The first step to building the focus item is to choose what the focus or goal is. There are three options:

  1. Collect data - will use a Mautic form in the output as the content. Note that it should be a very simple form (One or or two inputs) as there is very little room to work with in some of the styles. But this is great for capturing emails for a newsletter signup.
  2. Display a notice - information only and is great for announcements and the like.
  3. Emphasize a link - great for landing pages with an event, sale, promotion, etc. It displays a button to click that will direct to the given link.

Each focus/goal will have slightly different settings but all have a few in common:

  1. Animate? - simply determine if
  2. When to engage - this determines when the focus is engaged based on visitor interaction. It can be immediate, on scroll, timed, or with an exit attempt. If Visitor intends to leave is chosen, an option appears that allows configuration if links within the site should trigger the engagement or not.
  3. How often to engage - should the visitor be engaged every time, once per session, or during a period of time?
  4. Stop engaging after a conversion - once a user clicks the link or submits the form (not applicable for displaying a notice), enabling this option will no longer engage the visitor.

Focus Style

There are four styles supported -

  1. Bar - display a bar across the top or bottom of the page
  2. Modal - a small modal window that appears centred on the page
  3. Notification - these are like modals but smaller and slide in from the side.
  4. Full page - also like a modal only it takes up the entire view.

Each style has its own settings such as position, size, sticky, etc.

Colors

By default, Mautic will determine the top colors extracted from the snapshot. Four colors are currently supported for primary color, text color, button color, and button text color.

Content

Again this will vary based on the selected focus/goal and style is chosen. Some support a headline and a tagline while some support only a headline due to space constraints. If the goal is to collect data, a list of forms will be available to choose from. Remember that the form should be simple.

For advanced users

Content mode

A new section called ‘content’ has been added to the builder for focus items that enables you to format content in basic, editor or html mode. This opens the door for even more creativity when engaging visitors to your site.

Inserting focus into a website

Inserting a focus item into a website is as simple as copying one line of code and inserting it into your page’s source. After creating the focus item, view its details page where you can see engagement graphs and other detailed information. On the right, you’ll see a “Focus Installation” box that includes the line of code needed. Click on it, copy, then paste it into your website’s source before the closing body tag if possible.

Focus Items in Campaigns

Focus Items action depends on page visits. That means, you have add it just after Visits a page decision .

6.4 Mobile Notifications

Mobile notifications integrate your iOS and Android app with One Signal. Using your own OneSignal accounts, you can now push a notification to your contacts’s mobile device (with their permission). Enable these in Mautic’s configuration to see them listed under Channels in the menu.

For more information see One Signal iOS documentation and One Signal Android documentation

Setup

iOS Code for OneSignal integration

To enable push notifications in your iOS app, add the following code (or a variant of it) inside of your application func of AppDelegate . The code examples below use Swift 3.1. Please modify them to your needs if you’re using C#.

// Somehow determine the user email. If you have user accounts, it may be better to move
// this outside of the `application` func of `AppDelegate` in order to determine the user email.
// In this example, the address is hardcoded for ease of use.
let userEmail = "[email protected]"

OneSignal.initWithLaunchOptions(launchOptions, appId: "YOUR-ONE-SIGNAL-APP-ID")
OneSignal.syncHashedEmail(userEmail);

OneSignal.idsAvailable({(_ userId, _ pushToken) in
    let pushId      = userId != nil ? userId : ""
    let pushEnabled = pushToken != nil ? true : false
    let userData    = UserData(email: userEmail, push_id: pushId!, enabled: pushEnabled)

    self.pushUserDataToMautic(userData, "https://dev.mautic.com/notification/appcallback")
});

For ease of use, I’ve created the following struct and func for sending user data to Mautic. Create this struct in your app, and import it where appropriate.

UserData struct

struct UserData {
    var email   = String()
    var push_id = String()
    var enabled = Bool()

    static func toJSON(_ userData: UserData) -> String {
        let email   = userData.email
        let pushId  = userData.push_id
        let enabled = userData.enabled

        return "{\"email\":\"\(email)\",\"push_id\":\"\(pushId)\",\"enabled\":\(enabled)}"
    }
}

pushUserDataToMautic func

This is a basic function for pushing the UserData struct to your Mautic installation. It will push the user data, and then display the response from Mautic as an app alert. Modify to meet the needs of your app.

func pushUserDataToMautic(_ userData: UserData, _ url: String) {
    var request = URLRequest(url: URL(string: url)!)
    request.httpMethod = "POST"

    let postString = UserData.toJSON(userData)
    request.httpBody = postString.data(using: .utf8)

    let task = URLSession.shared.dataTask(with: request) { data, response, error in
        guard let data = data, error == nil else {
            // check for fundamental networking error
            return
        }

        if let httpStatus = response as? HTTPURLResponse, httpStatus.statusCode != 200 {
            // check for http errors
            return
        }

        // Comment the next 4 lines to remove the alert 
        let responseString = String(data: data, encoding: .utf8)
        let alert = UIAlertController(title: "Response Data", message: responseString, preferredStyle: UIAlertControllerStyle.alert)
        alert.addAction(UIAlertAction(title: "OK", style: UIAlertActionStyle.default, handler: nil))
        self.window?.rootViewController?.present(alert, animated: true, completion: nil);
    }
    task.resume()
}

Android Code for OneSignal integration

Coming soon…

Notification Stats

In addition to the UserData that gets pushed to Mautic, you can push open / interaction stats to Mautic by sending the UserData struct, with an appended stat JSON key.

6.5 Text Messages

This new channel was added in Mautic 1.4.0. It allows Mautic to send text messages from campaigns.

Configure Text Messages

Before you start to send text messages from your Mautic, it needs to be connected to the service which can send them. The first and default implemented service is Twilio. In order to configure the text messages correctly, follow these steps:

  1. Create an account at Twilio.com.
  2. In Mautic, go to Settings (cog icon) > Plugins .
  3. Open Twilio plugin and activate it.
  4. Copy the Account SID from Twilio account and paste it to Account SID field in the Twilio plugin configuration.
  5. Unlock and copy the Auth Token and paste it to Auth Token field in the Twilio plugin configuration.
  6. Go to Products > Phone Numbers in Twilio, copy the number and paste it to the Sending Phone Number field in Mautic.
  7. Select the Text Message Enabled? switch to Yes and save the Mautic configuration.

Create a new Text Message

A Text Message can be created/modified only via Campaign Builder.

  1. Go to Campaigns .
  2. Edit an existing campaign or create a new one.
  3. Open the Campaign Builder.
  4. Add a Send Text Message action to the canvas.
  5. Click the New Text Message button. The form in a new browser window will appear.
  6. Fill in the Internal Name , Text Message and if required, change the language. Save it.

The new Text message will be pre-selected so you can save the Send Text Message action as well. You can use the action in your Campaign dripflow.

6.6 Tweets mit dem Mautic Twitter plugin

This plugin can:

  • send a personalized tweet to a contact
  • display the tweets for a contact with valid Twitter handle,
  • load additional information from the Twitter profile,
  • place a share button to the landing pages.

Requirements

  • Mautic installed on a publicly accessible URL. This plugin won’t work on a localhost because callbacks from Twitter to Mautic are necessary.

Authorize the plugin

A Twitter application has to be created for authorization. To create/manage one, go to apps.twitter.com. While creating your Twitter app, you’ll have to insert a Callback URL . This callback URL is written in the Twitter plugin configuration.

When your Twitter app is created, copy the API Key to the Client Key field in Mautic’s Twitter configuration and API Secret to Client Secret field. Click the Authorize button.

Don’t forget to switch Published to Yes and save the configuration.

Configure the plugin

If your Twitter plugin is authorized correctly, you can configure the Features and Contact Field Mapping tab in the plugin configuration. The Features tab is self-explanatory. The fields like Tweet text , Via , Recommended and Hashtag are prepared there for future implementation with Twitter. Read here how to configure the Contact Field Mapping . If you don’t have a special field for Twitter handle yet, create it in the Contact Field section.

The tweets of a contact should appear on the contact’s profile as soon as the Twitter handle contact field is filled with an existing Twitter handle.

Use {sharebuttons} token in the Mautic Landing Pages in the place where you want to display the share buttons.

View contact’s tweet

When you have the Twitter plugin authorized and configured, you will be able to see contact’s tweet history in the contact’s detail page. But it will work only for contacts which have the Twitter handle (username) filled in their profile. See the limitations section below for more about that.

Tweet to a contact

It’s possible to tweet to a contact from a campaign. Either there is the special “Tweet contact” action where you can select the tweet which should be tweeted or you can use Marketing Messages Tweet channel to do the same thing.

The tweets can be tailored to the contact with tokens:

  • {twitter_handle} will be replaced with Twitter Handle (username) from the contact’s profile and so the contact will get Twitter notification about the mention.
  • {assetlink=2} will insert a link to the Asset with ID 2.
  • {pagelink=1} will insert a link to the Landing Page with ID 1. All these tokens are easily accessible in the UI, so you can just click a button or select the Asset/Landing Page you wish to include to the tweet.

Twitter API limitations

The original idea was that Mautic will search for additional information about a contact in various social platforms. But since the time the social plugins were written, social platforms restricted the API search only to the username.

6.7 Social Monitoring

It’s possible to add contacts to Mautic through monitoring Twitter for mentions and hashtags.

Requirements

Hashtags

Go to Channels->Social Monitoring and click New. Select Twitter Hashtags as the Monitoring Method. Type the hashtag you wish to monitor in the Twitter Hashtag box. Name the monitor and click save.

Mentions

The process is the same for Twitter mentions.

As people use the hashtag or mention that you’re monitoring, you’ll see them being added to your contact list. From there you can use that information in a Campaign.

7. Campaigns

Campaigns are central to creating an automated workflow to assist with your marketing efforts. Campaigns consist of various external points of contact which will engage your contacts. These engagements can be created to occur on predefined time intervals or in response to specific contact actions.

Time Driven Campaigns

The concept of time driven campaigns implies a form of campaign which centers around specific timed events. These events are most usually in the form of emails. These email events can be defined to be triggered after a delay of a predefined number of days or on a specific date in the future.

Contact Driven Campaigns

A second type of campaign is the contact driven campaign. These are campaigns which trigger events based on interactions from the contact. These can occur as a result of the contact landing on a certain page, opening an email, spending a specified amount of time on a website, or any number of other activities. The response to these actions would be an email sent either immediately or at some point in the future.

Mixed Campaigns

Obviously you are not limited to creating either one kind of campaign or another separately. Mautic allows you to create campaigns which consist of both time driven items as well as contact driven actions. This powerful mixed campaign means actions will be driven by both specific dates or after specific timeframes as well as actions taken by a contact directly (as mentioned above).

Campaign Actions

Email actions have been mentioned specifically as a particular use case, however there are many other responses the system can take. Other actions can include automatic assignment to a new segment, assigning a new point value, or an integration into a CRM or other system.

Campaign Automation

One of the main benefits of this campaign workflow process is the ability to predefine these workflows and have them respond automatically to your contacts and timelines. This automation minimizes the amount of time required for manual contact activity and improves reliability of contact nurturing through consistent contact.

7.1. Manage Campaigns

Campaign Overview

The campaign overview will show you many details of your campaign including the number of contacts which have been added to a campaign, the number of emails sent, and the number of page views resulting from the campaign.

Additional information includes a quick overview of what decisions and actions are available on a campaign, as well as a grid layout overview of all the contacts on a campaign.

As with many of the other overview screens you can view the recent activity taken place on the campaign.

Basic Campaign Creation

Creating campaigns is an easy process which involves picking a name, creating a description, and defining the segments to associate with the campaign. These campaigns can then be assigned a category and defined publishing information. All of these are rather standard aspects of a new campaign creation.

Note : The segment selection will only show public segments. This means any segments created by individuals within the company marked as private will not be available for campaigns.

Advanced Campaign Creation

The basics of campaign creation are handled easily by the initial screen but the finer details of building a campaign occur within the campaign builder. This might be considered advanced campaign creation but every campaign does need to use the campaign builder.

Executing Campaign Actions

Executing starting actions for contacts newly added to the campaign, scheduled actions and the actions on the “non-action” decision paths, must be triggered by the system. To do so, create a cron job that executes the following command at the desired interval:

php /path/to/mautic/app/console mautic:campaigns:trigger --env=prod

If you want to execute the command at different intervals for specific campaigns, you can pass the --campaign-id=ID argument to the command.

Building Campaign Contacts

Batch adding/removing contacts for campaigns is done by using the following command:

php /path/to/mautic/app/console mautic:campaigns:update --

7.2. Campaign Builder

The Mautic campaign builder gives you a blank canvas upon which to build your campaign workflow. The overall interface is clean and simple with easy to use events. These actions, decisions, or conditions can be added through clicking the “anchors” of events.

Sources

The first thing to be selected is where the campaign will pull in contacts from or contact sources. There are currently two options for contact sources: segments and forms. One or both can be added to the campaign.

After selecting one or more sources, the next step will be to add one or more actions (most likely), decisions and/or conditions:

Actions

Campaign actions are those items which are initiated by you. These are items which you will control and which affect your contacts involved in the campaign. Examples of these actions are adjusting a contact’s point totals, moving a contact to a different campaign, modifying the segments a particular contact is a part of, and lastly but perhaps most importantly sending of an email.

When you create a campaign you will select one of these actions to begin the workflow. In most cases this initial step will be an email sent to your segments.

You will notice that when you add an email to a campaign you will be able to select a potential delay for when the email is delivered. If the action is attached to a decision’s non-action initiated decision path, the delay becomes how long the contact has to take action before the campaign progresses down the non-action path.

After you have added an action you will more than likely place a decision on the campaign.

Decisions

Decisions are actions which are initiated by the contact. These decisions can be either directly initiated or implied based on non-action. Samples of these decisions are downloading an asset, opening an email, submitting a form, or visiting a landing page.

Decisions are taken in response to an action and as such a decision has two outcomes.

These two options are demonstrated by the green and red decision points on the decision. Each path can then be handled by your campaign. This process is typically referred to as a decision tree .

It is important to note that a contact must already be part of the campaign in order for it to recognize the decision executed. Therefore, campaigns should never start with a decision unless you are manually managing the contacts assigned to it and the decision is expected to be executed at a later time.

Contact-initiated Decision Path (Green Points)

Actions attached to the green point of a decision are considered contact-initiated points.

The contact-initiated decision path is taken as a result of a contacts direct action such as opening an email or submitting a form. Connected actions will be executed (or scheduled if a delay is set) at the time the contact took the action.

Non-action Initiated Decision Path (Red Points)

Actions attached to the red point of a decision are considered non-action points. This path is taken as a result of a contact NOT taking some direct action.

Use an action’s delay settings to define at what point the campaign should send the contact down this path.

To trigger these events, see Executing Campaign Actions.

Example

To provide a simple example of a decision tree consider an email where the decision is to open an email. There are two outcomes, if the contact chooses to open the email then the green decision point connects to the next action to be taken in the campaign workflow. If, however, the contact does not open the email then you may desire a different action to be taken (e.g. a delay of 30 days then a second email sent).

Conditions

Conditions can be used to execute different actions based on a contact’s data. For example, a condition can be configured to execute an action if a contact has an email or do something else if they do not.

The delay you set is ran before checking the condition no matter the delay you add on the connected actions. It will not wait the delay on the connected action to check the status of the condition to qualify the contact into the positive or negative path of the condition.

Currently there are 2 types of conditions

  1. Conditions based on Contact Field Value.
  2. Conditions based on Form Field Value.

Positive status Condition Path (Green Points)

Actions attached to the green point of a condition are considered as positive status points. The status condition path is taken as a result of the condition at the end of the delay set (trigger, delay or specific date).

Negative status Condition Path (Red Points)

Actions attached to the red point of a condition are considered as negative status points. This path is taken as a result of negative status for the condition at the end of the delay set (trigger, delay or specific date).

7.2.1. Custom date field to trigger a campaign

In the condition based on a contact field value, select the required date field. After selecting it, select “date” as operator. Then select the required value from drop-down.

Note: In “Anniversary” option only day and month value of the field is considered.

Usage:

One thing to remember is that campaign conditions are evaluated immediately. So if the date in the field matches the condition, then the positive action is executed. If the date doesn’t match, the negative action is executed. The contact doesn’t kind of “hang around” waiting for the condition to be true.

In order to run campaigns based on a particular date where a contact may or may not be “included” today:

  • create a segment with a filter where the date field = TODAY.
  • initiate the campaign based on that segment.
  • as people move in and out of the segment, the campaign will run.
  • you can elimiate the condition since the segment is changing daily.
  • note: this will NOT work for an anniversary - only an actual date.

Of course if someone appears again at a later date in that segment because the value of the date is changed, they’ll still only go through the campaign once and hence will NOT be included in the campaign again.

7.3. Campaign Events

Below are notes on some of the specific campaign events.

Campaign Actions

Send Email - Marketing vs Transactional

In the send email action, there is an option to select Transaction or Marketing. A transactional email is one that can be sent to the contact multiple times. A marketing email is one that can only be sent to the contact once across multiple sources (e.g. another campaign). If the contact has already received this email from another source or the current campaign, the email will not be sent again and the contact simply progresses on through the campaign.

Send email to user

This action will allow you to send email to:

  • any Mautic user
  • contact’s owner
  • any email addresses (TO, CC, BCC).

Emails sent through this action will not generate any statistics for contacts nor emails.

The email tokens will get populated with the real values including contact field values. But the email hash is bogus so the links like unsubscribe won’t work correctly. It’s similar behaviour like when a user sends itself a test email.

Send a Webhook

Action Send a Webhook with GET, POST, PUT, PATCH, DELETE, TRACE request support (curl). It was created based on GitHub discussion. Return true if page status code is 200/201. Data and headers values support contact field tokens ({contactfield=firstname} etc.).

Delete contact

This action will permanently delete the contact who will trigger this action in your campaign flow, together with all the information Mautic knows about that contact. See in the segment docs about how to use this action to delete all contacts in a segment.

The Delete contact action is special for 2 reasons:
  1. It will also delete the campaign event log record about that contact so this action will always show 0% progress in the campaign detail page. Even though it could have deleted some contacts. There is no record about it.
  2. This action doesn’t allow to connect other campaign events to it. There is no point in doing so since the contact won’t exist after this action is triggered.

Focus items

See in the Focus docs

Campaign Decisions

Opens Email

The opens email decision can only be attached to a send email action. Whatever email is sent through the action is the email used by the decision.

Visits a page

Note: The decision uses the OR operator between fields (Limit to Pages, URL, Referrer).

7.4. Campaign Troubleshooting

Page visits are not recognized

There can be a few reasons for this:

  1. Make sure that you are not testing the page visit while logged into Mautic. Mautic ignores user generated activity so use an anonymous session, another browser, or logout of Mautic.

  2. Ensure the contact getting tracked is in the campaign. The easy way to test this is to review the time line of the contact for the page hit.

  3. Campaigns are executed sequentially and will not repeat per contact. If the contact has already visited the page while part of the campaign and triggered the Visits a Page decision, subsequent visits will not re-trigger the actions associated with the decision.

  4. Ensure that the URL in the campaign action either matches exactly the URL visited or use a wildcard (note that the a URL can include the schema, host/domain, path, query parameters, and/or fragment).

For example, if you have a URL of http://example.com and the page hit registers as http://example.com/index.php?foo=bar , the campaign decision will not be triggered. However, if you use http://example.com* as the URL, it’ll match and thus trigger.

Another example is if you want to associate different page hits with specific campaigns. Let’s say you have Campaign A and Campaign B. You want to use the same base URL and path for both campaigns but differentiate with a query parameter. For Campaign A, you can define a Visits a Page decision with http://example.com/my-page?utm_campaign=A* and for Campaign B, http://example.com/my-page?utm_campaign=B* . Now a contact will only trigger the specific campaign desired. If the goal is to trigger both campaigns regardless of the query parameters, use http://example.com/my-page* .